
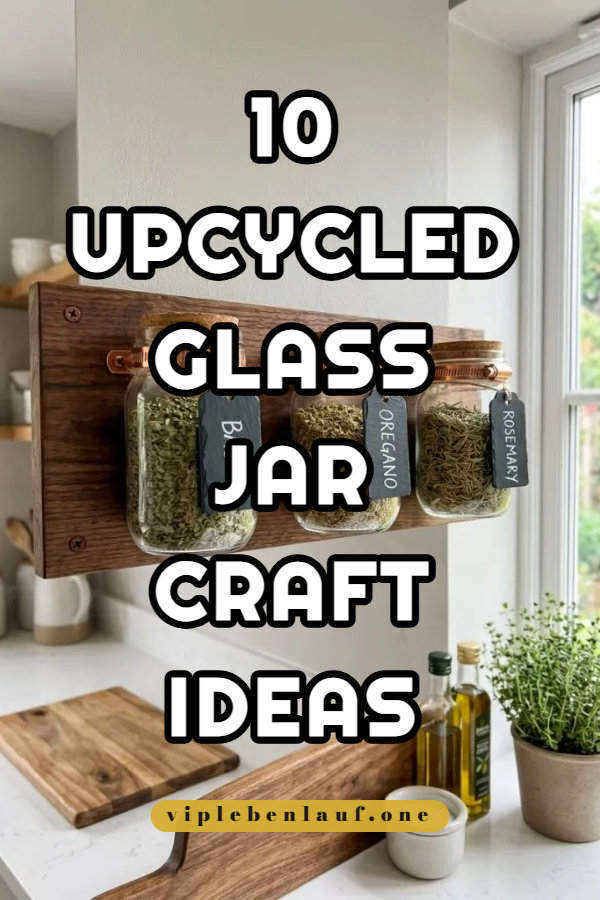
Transforming simple glass food containers into functional home accents has become a staple across modern Pinterest ideas. Upcycling glass jars offers an accessible avenue for eco-conscious makers, home organizers, and interior enthusiasts looking for practical, creative project solutions. In this comprehensive guide, readers will explore ten completely unique ways to repurpose discarded glass jars into durable kitchen organizers, ambient lighting fixtures, and decorative household items. Using standard craft tools combined with everyday materials, these tutorials outline clear step by step techniques for tinting glass, assembling mounting hardware, and executing precise surface decoration. Beyond diverting glass waste from landfills, learning these construction methods helps crafters master spatial layout, glass prep work, and long-lasting adhesive joinery. This structured tutorial delivers actionable instructions to convert ordinary food jars into elevated, aesthetic home accents efficiently.
Why This Idea Is Trending or Useful
Upcycling glass jars remains highly popular across modern Pinterest inspiration due to its low material cost and exceptional functional versatility. As minimalist style interior aesthetics continue to influence residential styling, reusing clear glass containers allows makers to achieve clean, uncluttered storage displays without buying expensive glassware. These creative ideas offer unmatched DIY appeal because glass jars are non-porous, structurally durable, heat-resistant, and visually transparent. For beginner friendly building sessions, glass provides an easy material surface to customize with paint, wire, or natural cordage without needing industrial machinery. Furthermore, finished projects solve everyday storage challenges by organizing kitchen pantries, decluttering bathroom counters, and adding warm texture to living room displays while staying well within modest household budget plans.
Materials and Preparation
Thorough surface preparation and proper material selection are critical steps when upcycling glass containers to ensure durable paint adhesion and secure mounting joints. Essential materials include cleaned glass food jars, translucent glass paints, chalk-finish acrylics, silicone adhesives, wooden mounting boards, metal hose clamps, and natural twine. Core tools feature precision foam brushes, fine-grit sandpaper, a low-temperature hot glue gun, isopropyl alcohol, and a measuring tape. Preparation requires soaking jars in warm soapy water to peel away paper labels, followed by wiping the exterior surfaces with alcohol to remove oils. Lightly scuffing designated paint zones with fine sandpaper creates a micro-textured surface that promotes uniform paint bonding. Taking time for thorough cleaning and layout planning ensures your creative project achieves high durability and a professional handmade finish.
Idea 1: Copper-Accented Wall Hanging Herb Storage
How to Create
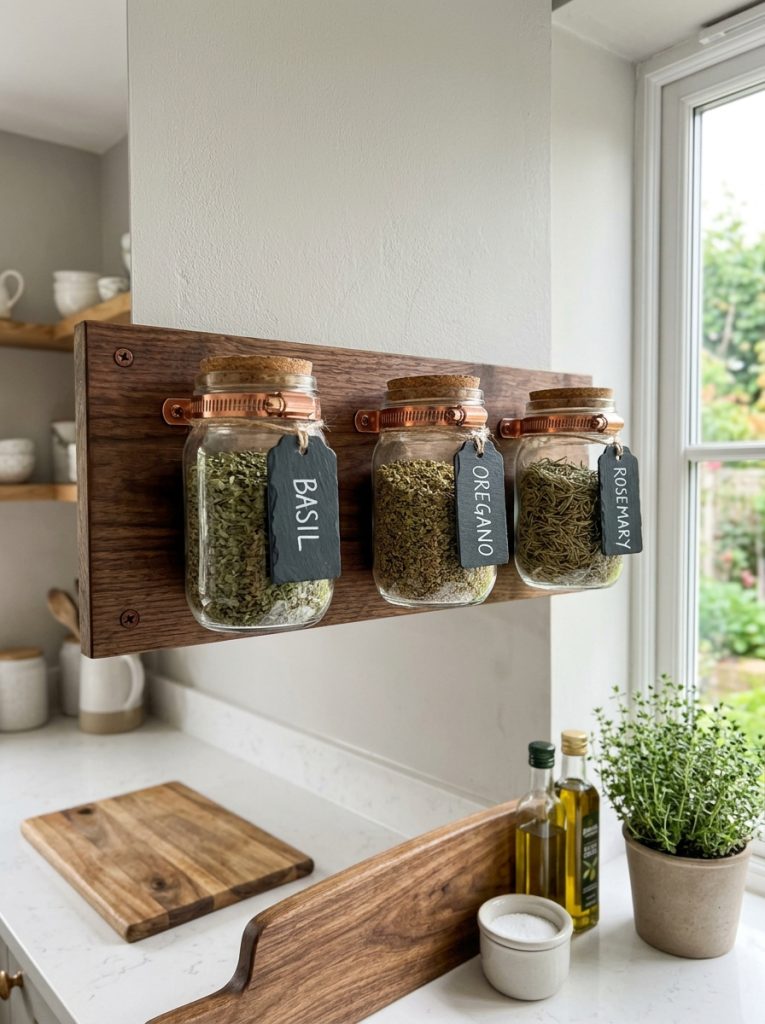
Building a copper-accented wall hanging herb storage unit turns flat wooden boards and glass jars into a vertical spice display for contemporary kitchens. Begin by sanding a twelve-inch pine mounting board and applying a coat of dark walnut wood stain, allowing it to dry for four hours. Position three copper hose clamps horizontally across the board surface at equal four-inch intervals, securing each metal clamp centrally with a single heavy-duty wood screw. Insert clean, label-free eight-ounce glass jars through the open copper loops, tightening the side screw mechanisms until the jars fit snugly without shifting. Label the front face of each glass container using a small rectangle of black slate vinyl and white paint pens for clear ingredient identification. Mount the entire stained wooden assembly flat against a kitchen wall stud, filling the glass receptacles with dried basil, oregano, and thyme to keep culinary herbs organized and accessible.
Idea 2: Etched Frosted Glass Bathroom Vanity Organizer
Step-by-Step Guide
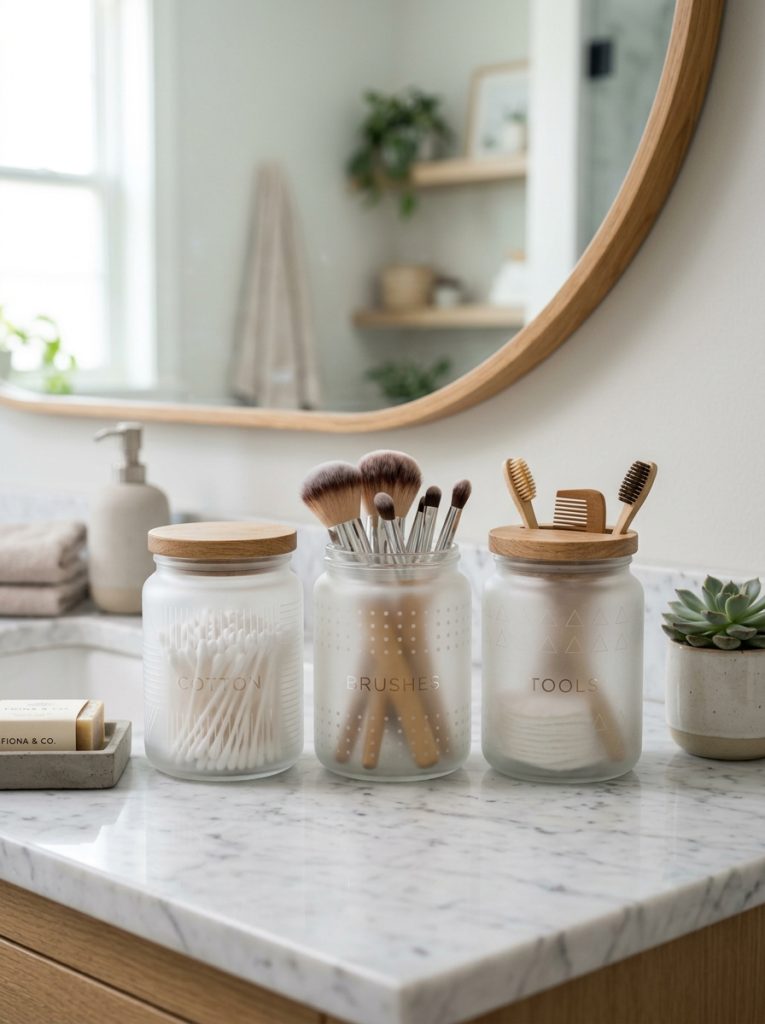
Constructing an etched frosted glass vanity organizer creates a cohesive, semi-opaque bathroom storage set designed for cotton swabs, pads, and makeup brushes. Clean three wide-mouth glass jars thoroughly with isopropyl alcohol to remove all surface oils and residual dust particles. Apply strips of geometric painter tape around the exterior glass midsection to mask off clean diagonal lines and crisp stripe patterns. Brush a thick layer of glass etching cream over the exposed unmasked glass zones using a dense foam applicator, allowing the chemical compound to react for five minutes. Rinse the etching cream away under cool running water, peel off the protective painter tape, and dry the frosted glass surface completely with a micro-fiber cloth. Top each etched glass vessel with a polished wooden lid to protect internal vanity items from moisture, maintaining a clean minimalist style across bathroom counter surfaces.
Idea 3: Macrame Wrapped Hanging Prism Lantern
Setup Method
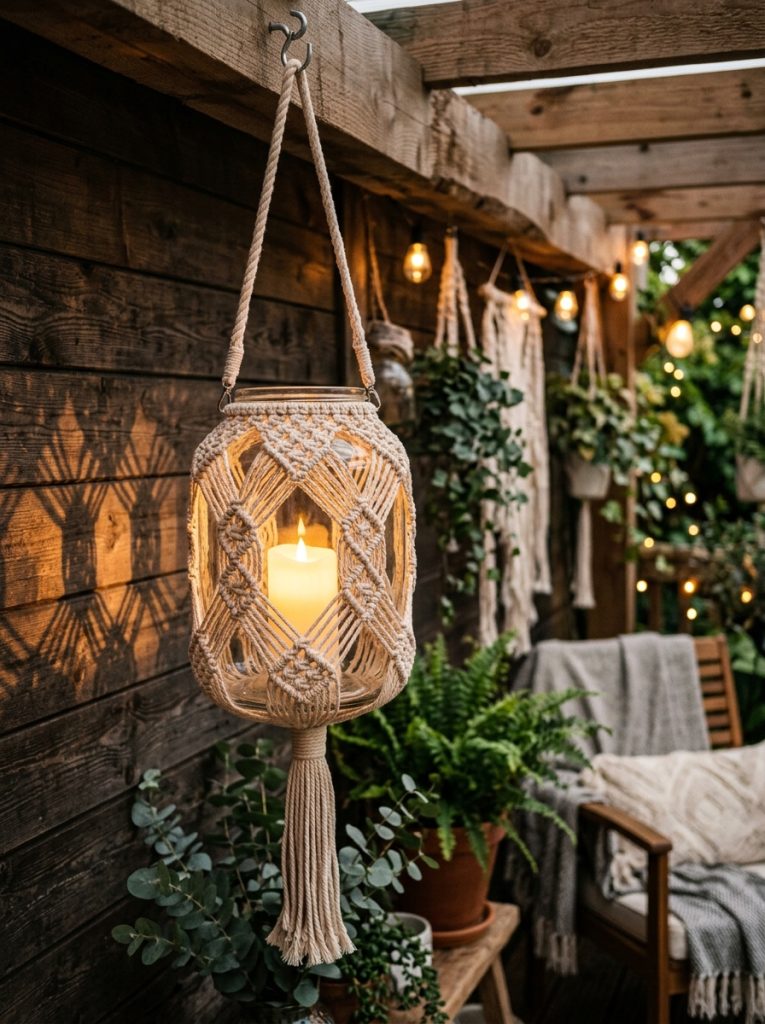
Assembling a macrame wrapped hanging prism lantern converts plain glass jars into ambient lighting fixtures suitable for outdoor patios or reading nooks. Cut eight four-foot strands of natural cotton cord, looping them around a central anchor ring placed around the threaded neck perimeter of a large glass jar. Tie adjacent cord pairs together using alternating square knots, creating a net-like diamond mesh pattern that cradles the curved body of the glass vessel tightly. Secure the lower knot cluster directly beneath the bottom center of the jar base, trimming excess fringe cords to form a neat three-inch tassel ornament. Insert a battery-operated flameless LED tealight candle inside the bottom of the glass container to eliminate open flame risks. Hang the completed textile light fixture from an overhead ceiling hook, allowing the woven knot framework to cast intricate geometric shadows across surrounding walls.
Idea 4: Layered Terrazzo Painted Desktop Pencil Well
Execution Process
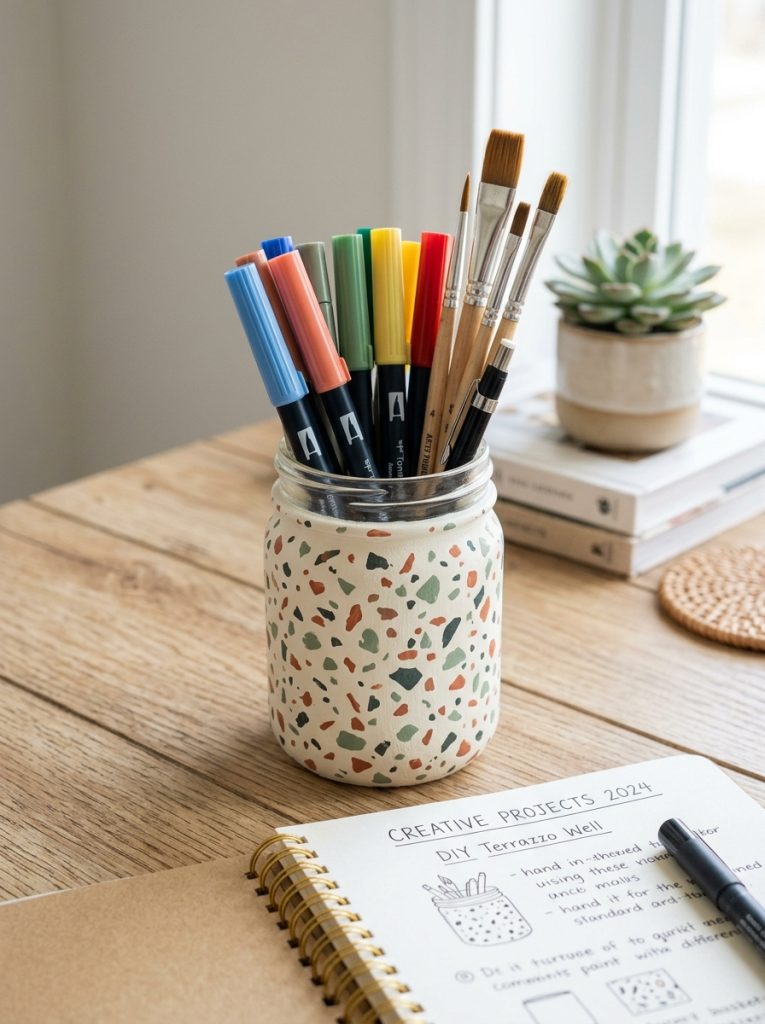
Fabricating a layered terrazzo painted pencil well turns tall pasta sauce jars into heavyweight desk organizers for pens, markers, and paintbrushes. Coat the outer surface of a smooth glass jar with two coats of neutral ivory chalk paint, allowing each layer to dry fully to build opaque coverage. Dab small, irregular shapes of terracotta, sage green, and charcoal acrylic paints onto the dry base coat using a fine-point detail brush to imitate real terrazzo stone fragments. Once the painted geometric specks cure, lightly sand the surface with extra-fine sandpaper to flatten subtle paint ridges and unify the texture across the glass. Apply a protective coat of clear matte acrylic sealer over the entire painted exterior to shield the handmade finish against scratches during daily desk use. Place the completed storage well on a workspace table to maintain an organized desk setup.
Idea 5: Mounted Floating Magnetic Spice Container
How to Make
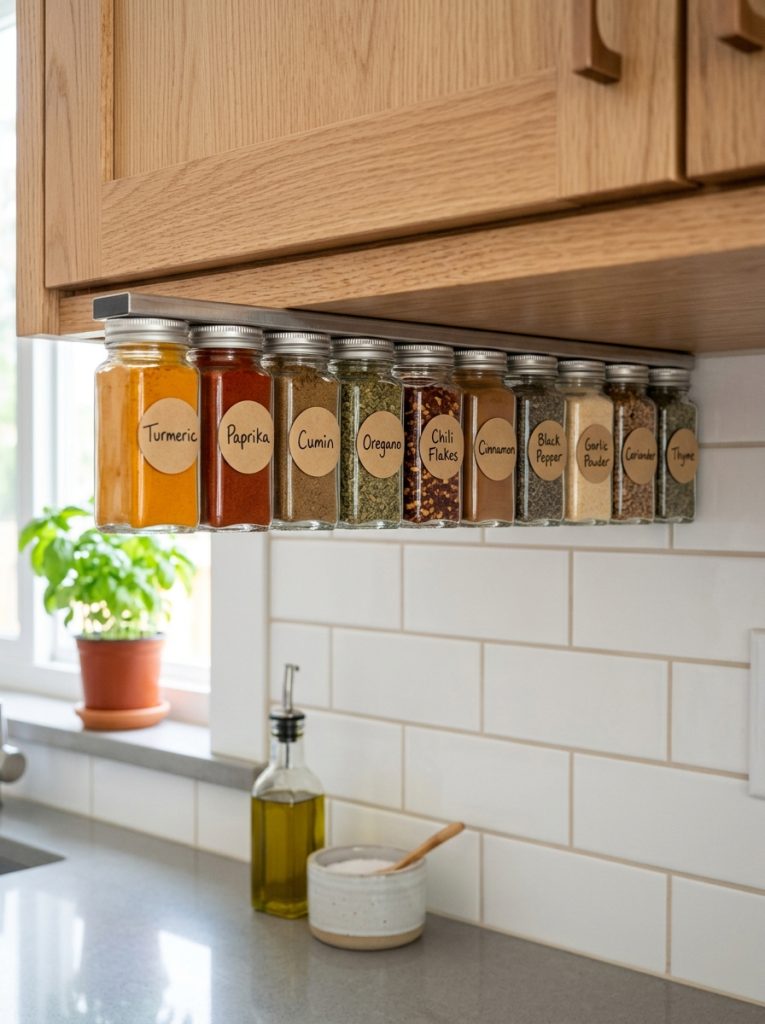
Manufacturing a mounted floating magnetic spice container system utilizes unused cabinet underside space to store cooking ingredients out of sight. Glue a strong neodymium disc magnet to the center top of a flat metal jar lid using high-strength two-part epoxy adhesive, letting it cure undisturbed overnight. Mount a flat stainless steel magnetic strip to the underside of your kitchen wall cabinets using countersunk wood screws to establish a magnetic anchor track. Fill small four-ounce glass jars with ground spices, screwing the modified magnetic metal lids tightly onto the jar threads. Snap the top of each glass container directly onto the cabinet steel strip, allowing the internal magnetic pull to suspend the jars vertically above the countertop. This easy project keeps cooking spices visible and accessible while maximizing counter space for food preparation activities.
Idea 6: Stained Glass Style Mosaic Candle Pillar
Step-by-Step Guide
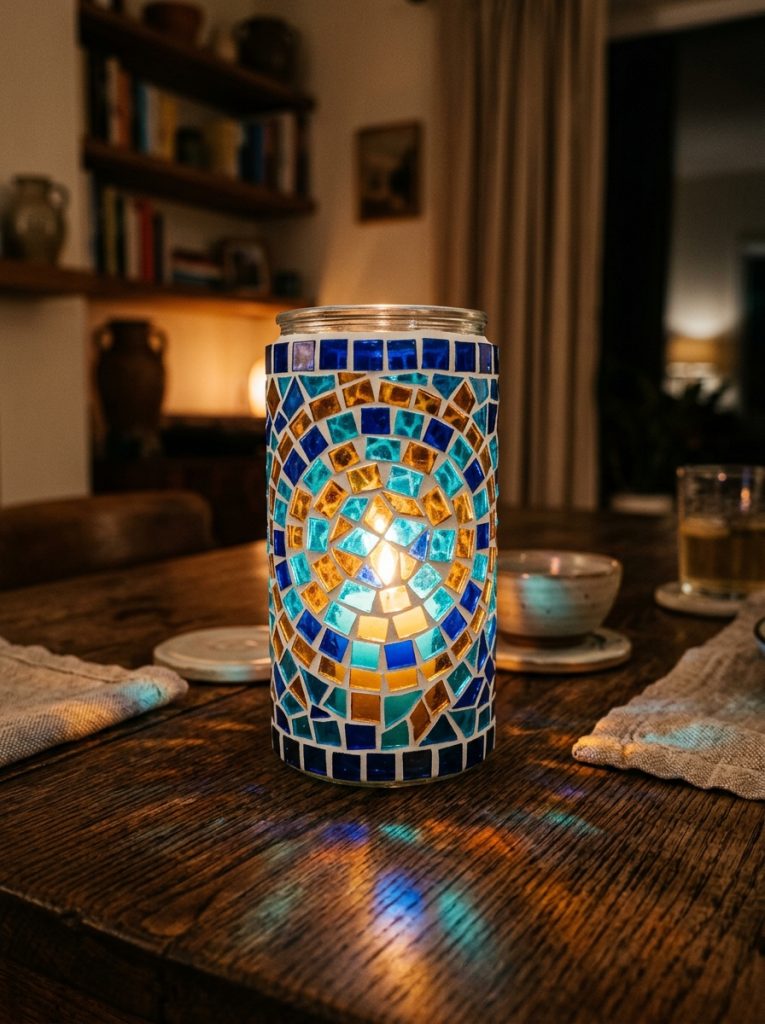
Designing a stained glass style mosaic candle pillar transforms clear glass jars into radiant colorful accent pieces for living room display tables. Cut small quarter-inch squares of colored translucent stained glass sheets or rigid tinted resin tiles using glass mosaic nippers. Apply a thin layer of clear waterproof silicone adhesive to the back of each colored glass tile, pressing them onto the outer glass jar surface in alternating color rows. Maintain a uniform sixteenth-inch gap between adjacent mosaic tiles across the entire cylindrical glass wall to leave space for traditional grout line fills. Spread pre-mixed white acrylic mosaic grout into the tile gaps with a rubber squeegee, wiping away excess haze from tile faces using a damp sponge after fifteen minutes. Place a small votive candle inside the completed glass vessel to project glowing color hues across interior tabletops.
Idea 7: Tiered Decorative Craft Bead Dispenser
Setup Method
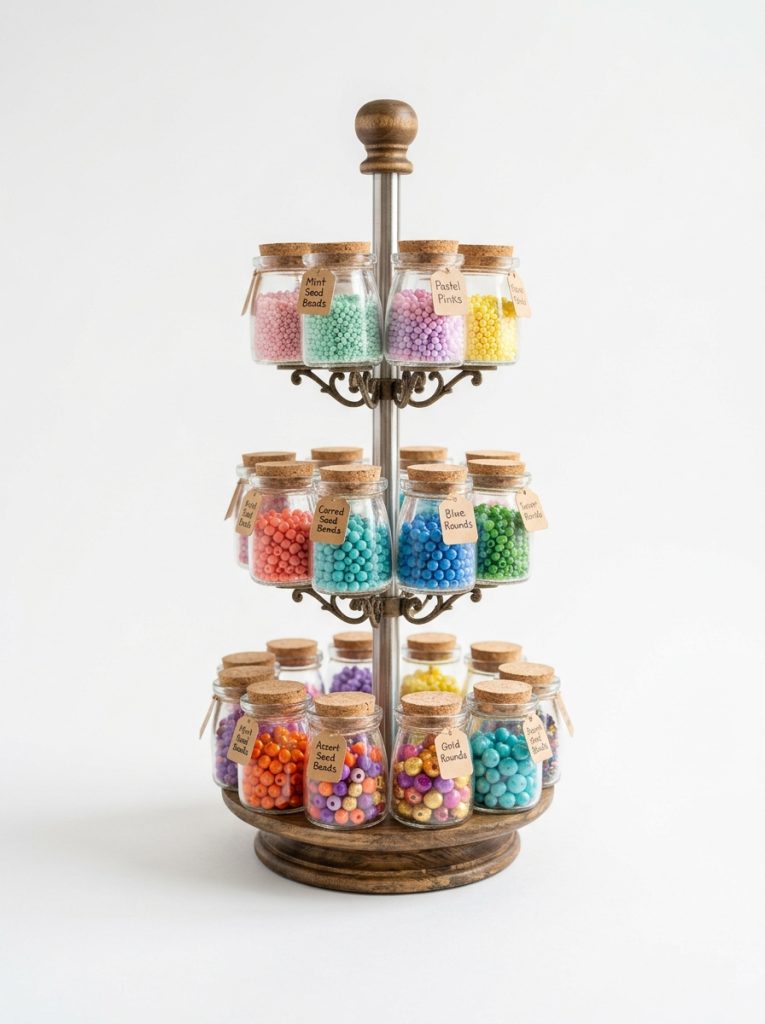
Crafting a tiered craft bead dispenser provides a vertical storage column that keeps small jewelry supplies, buttons, and sequins organized within small glass jars. Select three glass jars of decreasing sizes, drilling a central half-inch hole through the metal lid of the largest and medium containers using a step drill bit. Insert a threaded steel center rod through the base metal lids, securing each jar tier at three-inch vertical intervals using matching hex nuts and rubber washers. Thread the smallest glass jar onto the top end of the central rod assembly to create a balanced vertical storage tree structure. Fill each glass compartment with color-sorted crafting beads or sewing notions, screwing the jar bodies upward into their fixed overhead lids. This tutorial delivers a space-saving desktop storage unit that prevents small craft items from spilling across work tables.
Idea 8: Distressed Rustic Photo Display Frame
Execution Process
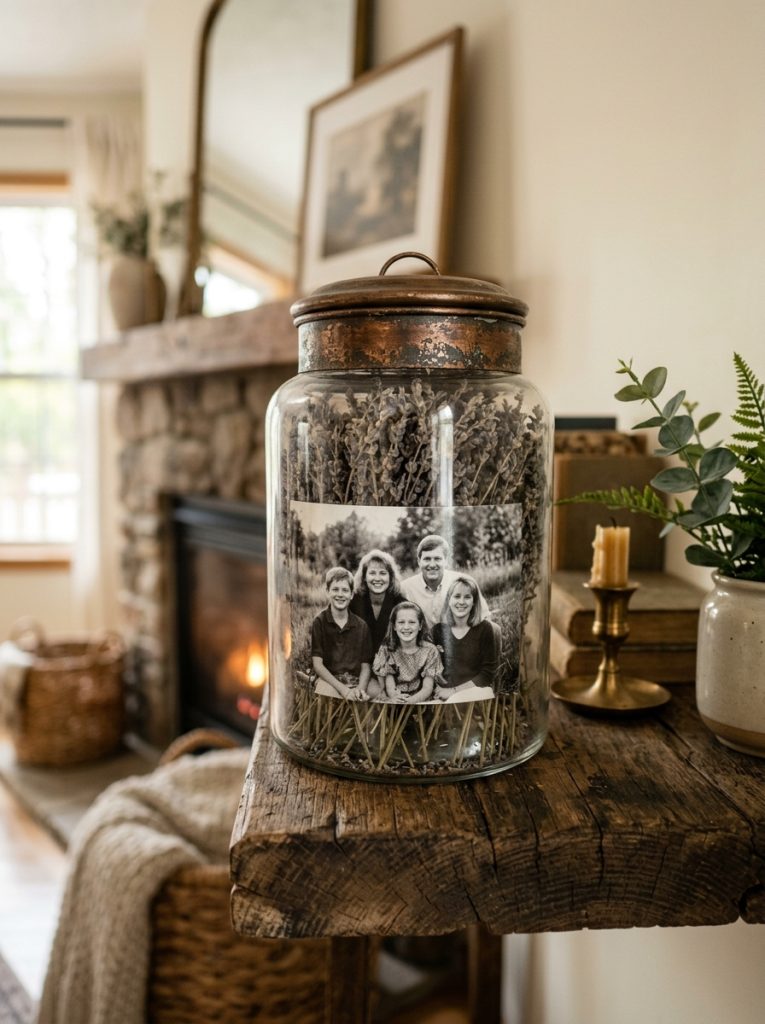
Constructing a distressed rustic photo display frame turns wide glass jars into three-dimensional image displays that protect family photographs behind glass walls. Print a high-resolution black and white photograph onto matte photo paper, trimming the print dimensions to match the height of your selected glass container. Curve the flexible photograph gently and insert it face-outward inside the glass jar, pressing the paper flush against the smooth internal glass wall. Fill the center space behind the installed photograph with natural dried lavender stems or fine white sand to hold the image securely in place. Paint the outer threaded rim of the glass jar with antique bronze acrylic paint, lightly distressing high edges with steel wool for a vintage look. Display the glass photo vessel on a fireplace mantle or bookshelf to add architectural depth to room gallery displays.
Idea 9: Submerged Aquatic Plant Propagation Station
How to Make
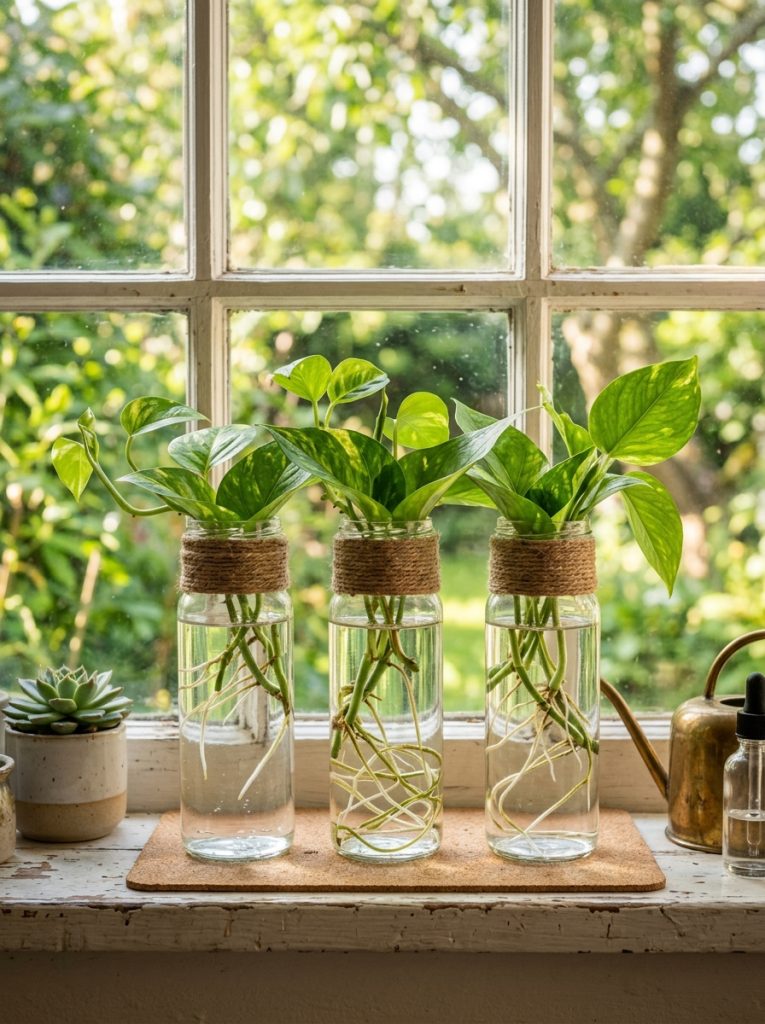
Assembling a submerged aquatic plant propagation station uses clear glass jars to root plant cuttings while adding botanical decorative elements to interior windowsills. Select several narrow glass jars, thoroughly washing the interior surfaces with warm water to remove residual dirt or soap film. Wrap natural jute twine tightly around the neck of each glass container, securing the cord ends with a dab of hot glue to form a decorative rustic band. Fill each glass jar three-quarters full with filtered room-temperature water, adding a small piece of natural horticultural charcoal to keep the water clear over time. Insert healthy plant cuttings, such as pothos or philodendron stems, ensuring leaf nodes remain submerged beneath the water surface. Place the transparent glass vessels on a sunny windowsill to observe root growth, creating an aesthetic plant display that enhances indoor garden spaces.
Idea 10: Cast Concrete Base Glass Hurricane Lamp
Step-by-Step Guide
Fabricating a cast concrete base glass hurricane lamp combines smooth industrial concrete textures with clear glass jars to build heavy outdoor patio lanterns. Mix quick-setting concrete compound with water inside a flexible plastic mold dish until it reaches a thick paste consistency. Press the bottom two inches of a clean glass jar directly into the center of the wet concrete mixture, supporting the jar vertically with painter tape until the concrete sets. Once cured after twenty-four hours, peel away the outer plastic mold to reveal a solid concrete base molded tightly around the glass lower section. Sand the concrete exterior smooth with medium-grit sandpaper, applying a coat of clear matte masonry sealer to protect against weather moisture. Place a tall pillar candle inside the glass shield to protect the open flame from wind gusts during evening outdoor gatherings.

Common Beginner Mistakes and How to Avoid Them
Working with upcycled glass jars presents specific material challenges related to smooth surface paint flaking, glue failure, and glass breakage during drilling. A frequent error among beginners is applying acrylic paint directly onto uncleaned glass surfaces, which causes the paint layer to peel off easily once dry. Avoid paint failure by thoroughly wiping glass containers with isopropyl alcohol and applying a primer formulated for non-porous surfaces. Another common mistake involves using standard twist drill bits when modifying metal lids or glass walls, which deforms thin metal rims and shatters brittle glass. Always use sharp step drill bits for thin metal lids and specialized diamond hole saws lubricated with water when drilling glass directly. Additionally, avoid exposing upcycled glass vessels to rapid temperature changes during washing or candle placement to prevent thermal stress cracking.
Practical Tips for Better Results
Achieving professional-quality finishes when upcycling glass jars requires attention to surface prep, precise adhesive selection, and protective sealing techniques. Always soak dirty food jars in a warm bath mixed with baking soda to dissolve stubborn commercial label glues cleanly without scratching the glass surface. When painting glass, apply multiple thin coats using a high-density foam roller or spray paint rather than thick brush applications to avoid visible streak marks. Use two-part epoxy or silicone structural adhesives instead of standard white craft glue when securing heavy hardware components like magnets or mounting brackets to glass. Allow all painted surfaces and adhesive joints to cure for a full twenty-four hours before subjecting finished items to daily handling or moisture exposure. Following these core guidelines ensures your completed projects achieve long-lasting structural strength and a clean aesthetic finish.
Styling, Presentation, or Organization Ideas
Integrating upcycled glass jar crafts into your home decor relies on matching visual finishes, balanced spatial arrangements, and intentional color palettes. For a modern minimalist style, paint glass bases in monochromatic neutral shades such as off-white, soft charcoal, or warm tan to complement contemporary furniture pieces. Group glass storage jars in odd-numbered clusters of three or five on open kitchen shelving or bathroom counters to create balanced visual compositions. When presenting lighting accents like glass lanterns, place them against textured brick or dark painted walls to accentuate the contrast of light passing through glass. Label pantry storage jars using uniform printed vinyl text or hand-lettered chalk labels to keep kitchen ingredients sorted cleanly. Maintaining visual consistency across your finished upcycled projects ensures handmade items look cohesive, refined, and naturally integrated throughout residential interiors.
Budget or Time Planning
Managing project expenses and craft schedules guarantees an efficient, cost-effective DIY experience when creating upcycled glass jar accessories. Because the main structural component consists of post-consumer glass containers, material costs remain minimal, allowing crafters to allocate funds toward premium hardware, paints, and specialty sealers. Allocate roughly twenty percent of your project budget toward basic cleaning supplies and sandpaper, forty percent toward specialty glass paints and clear coats, and forty percent toward mounting hardware or adhesives. In terms of time management, budget fifteen minutes for label removal and glass cleaning, forty-five minutes for structural cutting, assembly, or painting, and thirty minutes for detail styling. Allowing twenty-four hours for total paint curing and glue drying ensures your completed project maintains structural durability, preventing accidental breakage during routine household use.
Creative Expansion and Advanced Inspiration
Once foundational glass jar upcycling techniques are mastered, crafters can expand these practical projects into larger interior installations and custom home accessories. Experiment with combining glass jars with structural metal pipe fittings, finished hardwood planks, or macrame wall hangings to create complex hybrid display units. Integrate low-voltage LED micro-wire string lights inside multi-jar wall installations to transform simple glass storage displays into soft ambient accent lighting features. Advanced makers can also explore custom glass etching designs using vinyl cutter stencils, creating personalized glass storage sets for weddings, holidays, or boutique gift displays. Documenting your step by step project process and sharing high-resolution photos on platforms like Pinterest inspires wider community engagement while highlighting how upcycled materials can be transformed into high-utility home decor.