
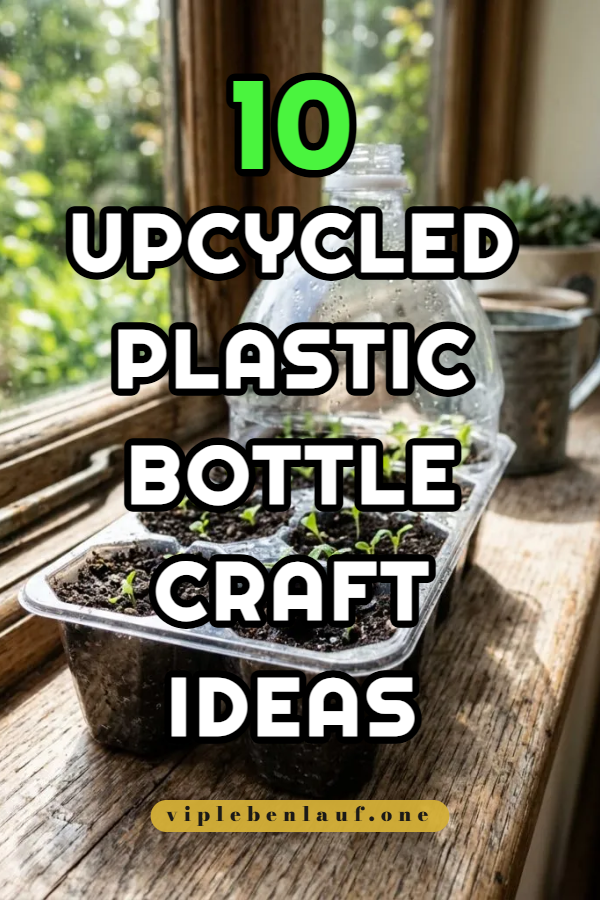
Repurposing household plastics into functional home items and artistic accents has become a central theme across modern Pinterest ideas. Upcycling plastic bottles presents an accessible opportunity for eco-conscious decorators, educators, and families looking for practical creative projects. In this detailed guide, readers will learn ten completely unique ways to transform discarded plastic containers into structured organizers, self-watering vessels, and decorative household accessories. Utilizing basic home tools alongside simple materials, these tutorials demonstrate step by step methods to manipulate polyethylene terephthalate plastics into sturdy, attractive installations. Beyond reducing domestic plastic waste, mastering these fabrication techniques helps makers understand material shaping, clean cutting methods, and durable surface finishing. This comprehensive tutorial provides clear, actionable instructions to turn everyday plastic bottles into lasting, high-utility decorative items for any living space.
Why This Idea Is Trending or Useful
Upcycling plastic bottles continues to trend across domestic visual boards due to its high practical value and zero-cost raw material access. As sustainable living strategies become integral to contemporary interior decoration, converting single-use packaging into useful tools aligns with eco-friendly lifestyle choices. These creative ideas offer exceptional DIY appeal because plastic bottles are lightweight, water-resistant, structurally resilient, and easily cut into geometric forms. For beginner friendly building sessions, plastic provides a flexible medium to experiment with surface texturing, spatial arrangement, and modular organization without expensive investment. Additionally, the completed projects fulfill real storage needs by decluttering workspaces, enhancing home gardens, or introducing a clean minimalist style aesthetic to interior shelving units on an realistic budget.
Materials and Preparation
Proper surface preparation and tool selection are essential steps before launching any plastic bottle upcycling project to ensure smooth edges and strong assembly joints. Core materials include thoroughly washed and dried plastic bottles of various volumes, acrylic paints, decorative twine, heavy cardstock, and non-toxic silicone adhesives. Essential tools include utility shears, precision craft knives, a low-temperature hot glue gun, fine-grit sandpaper, a flexible tape measure, and a hole puncher. Preparation requires soaking bottles in warm soapy water to strip exterior adhesive labels completely before sanding the slick plastic outer surfaces lightly to improve paint and glue adhesion. Taking time for accurate measurement and careful layout planning ensures your creative project achieves high structural stability and a refined visual finish.
Idea 1: Self-Watering Tiered Herb Planter Column
How to Create
Building a self-watering tiered herb planter column maximizes vertical balcony space while keeping kitchen herbs hydrated through capillary moisture transport. Cut a two-liter plastic bottle horizontally four inches below the threaded spout section using utility shears, turning the top neck upside down to fit inside the lower base reservoir. Punch a small hole through the center of the plastic bottle cap, threading a six-inch strand of cotton thick yarn through to act as a natural water-wicking cord. Fill the inverted neck section with loose organic potting soil, securing the cotton wick centrally within the soil matrix, and pour two inches of fresh water into the lower base container. Connect three identical inverted bottle assemblies vertically using clear weather-resistant nylon cable ties wrapped around structural support dowels. Plant fresh basil, mint, or parsley seeds inside the upper soil compartments and place the entire assembly in direct sunlight. This functional easy project creates a self-sustaining indoor garden unit requiring minimal routine maintenance.
Idea 2: Modular Prism Desktop Stationery Organizer
Step-by-Step Guide
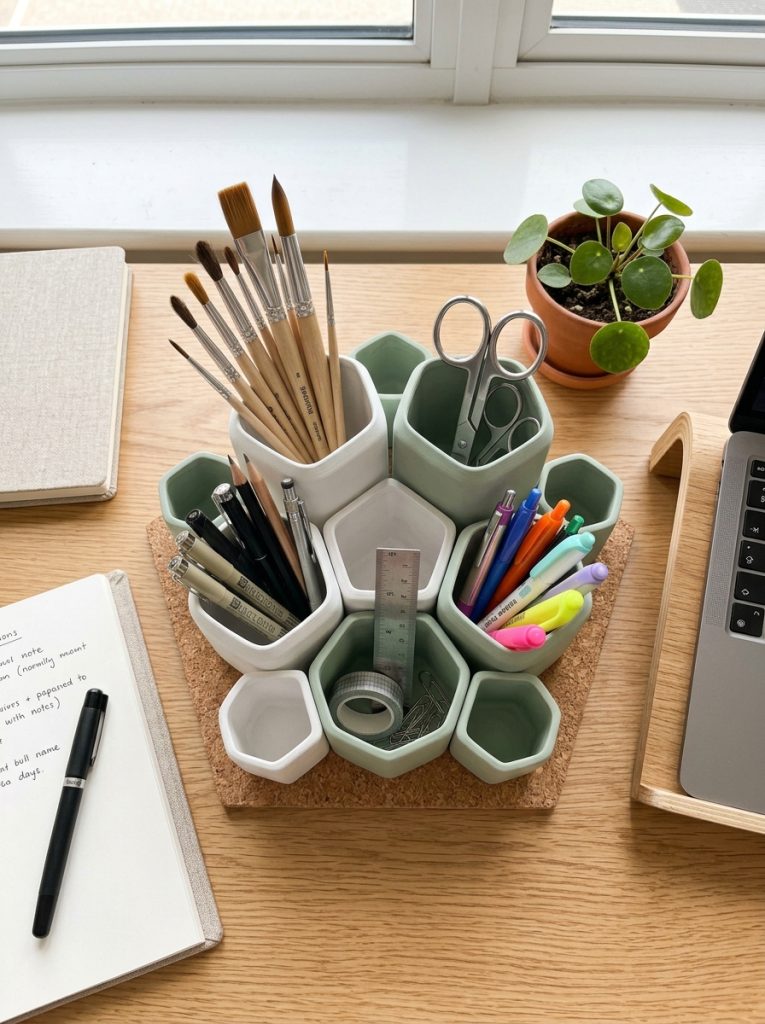
Constructing a modular prism desktop stationery organizer transforms clear plastic water bottle bases into a structured geometric desktop holder for office supplies. Cut the bottom four-inch segments from five one-liter square-profile plastic bottles using a sharp craft knife, smoothing any rough plastic rim edges with fine-grit sandpaper. Apply a coat of matte white acrylic primer to the interior of each plastic container segment, followed by two thin coats of soft pastel paint to establish a clean modern design color palette. Arrange the five painted plastic boxes into a tight pentagonal cluster, securing adjacent exterior walls together using clear structural silicone adhesive or strong double-sided mounting tape. Glue the entire cluster onto a thick cork base sheet, trimming excess outer cork edges flush with a craft knife for a polished bottom finish. This durable organization project keeps pens, paperclips, and scissors neatly separated while maintaining a sophisticated minimalist style across your workspace.
Idea 3: Woven Plastic Strip Hanging Bird Feeder
Setup Method
Assembling a woven plastic strip hanging bird feeder provides a durable, weather-resistant outdoor station that attracts wild songbirds to gardens. Slice the midsection of three flexible plastic water bottles vertically into half-inch wide strips, discarding the top spouts and solid bottom bases. Interweave the flexible plastic strips in an alternating crisscross basket weave pattern to form a sturdy open-mesh cylindrical cage, securing the outer wire junctions with small drops of clear waterproof glue. Insert two wooden craft dowels perpendicularly through lower mesh openings to serve as sturdy perches, placing a small circular plastic base dish at the bottom to hold birdseed mix. Attach a braided jute cord harness to the top woven rim for easy suspension from outdoor tree branches. This actionable tutorial produces a lightweight, long-lasting wildlife accessory while demonstrating basic structural weaving concepts using flexible upcycled plastic components.
Idea 4: Hanging Hydroponic Lettuce Cradle
Execution Process
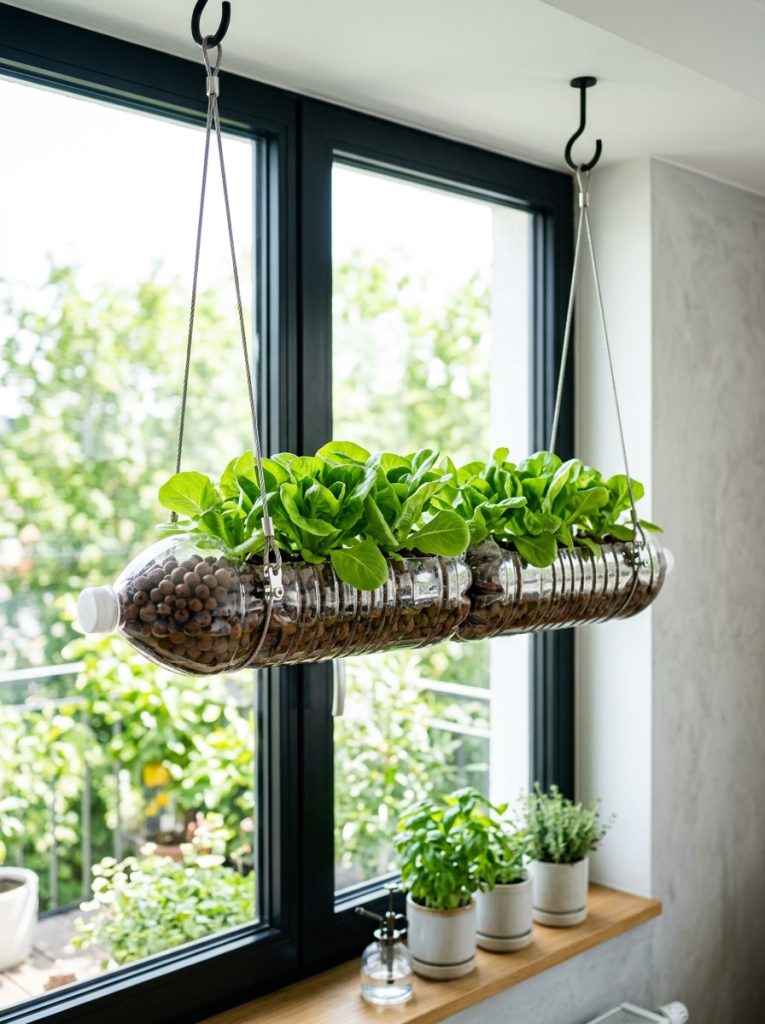
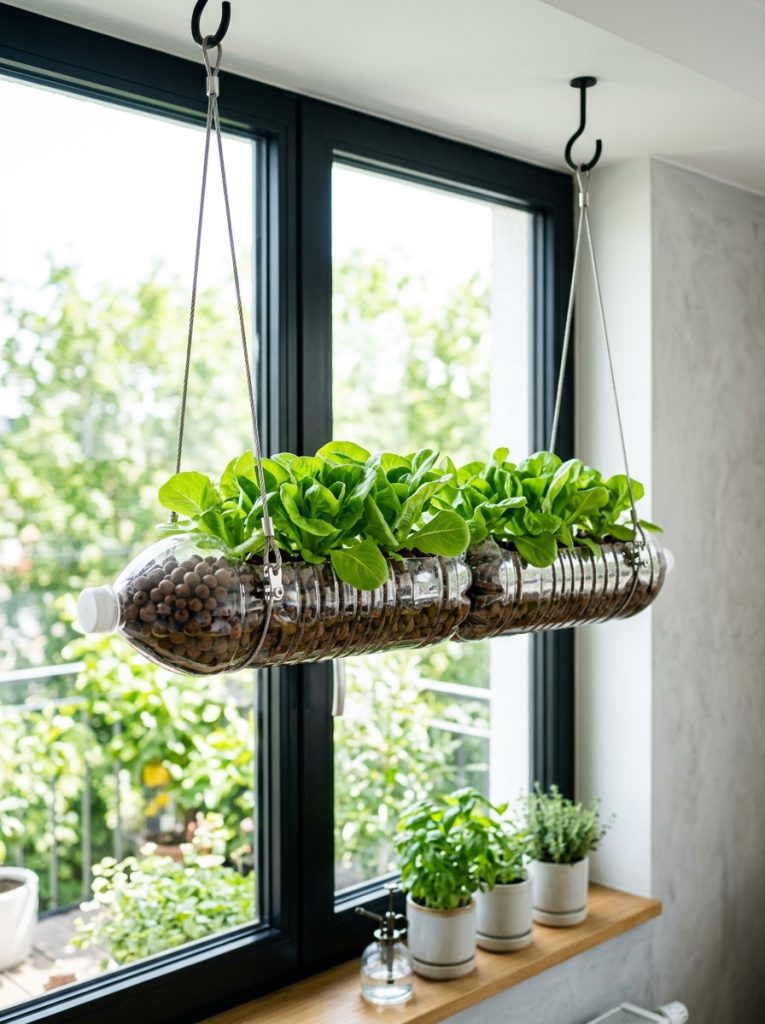
Fabricating a hanging hydroponic lettuce cradle allows urban home gardeners to cultivate fresh leafy greens vertically using aerated nutrient-water solutions without soil. Lay a large two-liter plastic bottle horizontally, cutting a broad rectangular three-inch by six-inch opening along the top side using a utility knife. Drill two small drainage overflow holes half an inch below the cutout rim to maintain proper liquid height inside the horizontal reservoir. Punch two holes on opposite ends of the bottle body, threading coated stainless steel hanging wire through to create a balanced dual-suspension harness. Place expanded clay pebbles inside small net cups positioned within the bottle cutouts, allowing plant roots to submerge into the nutrient-rich water below. Hang the completed cradle near a sunny window or under indoor grow lights for year-round agricultural production. This beginner friendly project offers a modern design solution for indoor food cultivation.

Idea 5: Embossed Sculptural Wall Sconce Light
How to Make
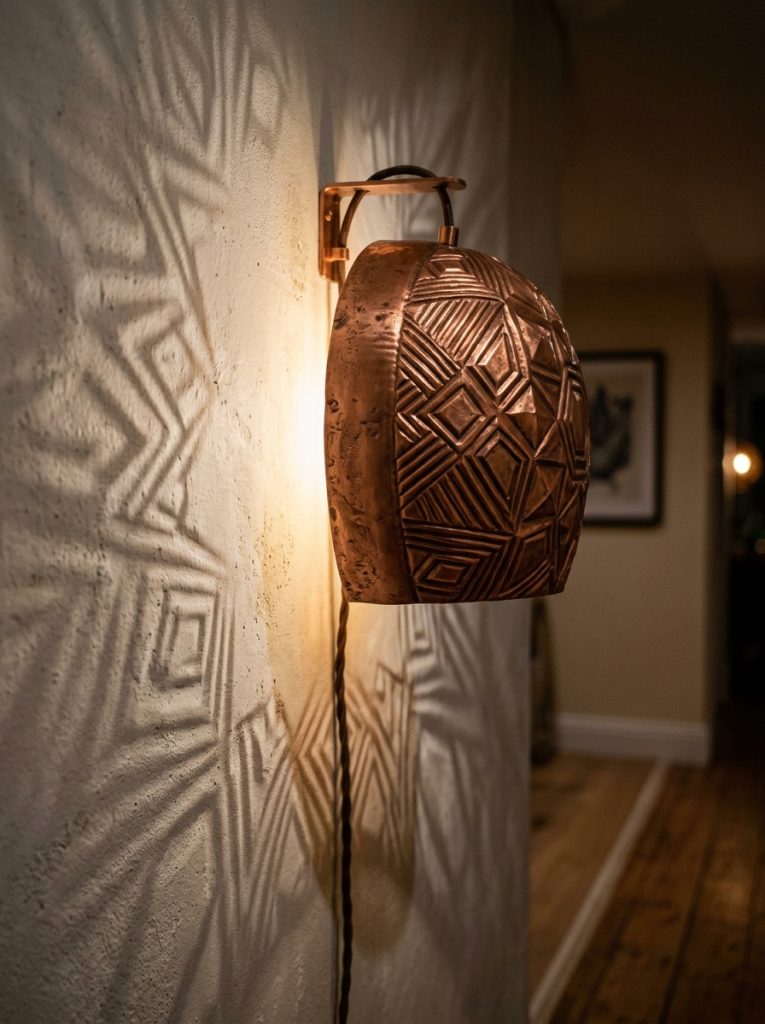
Manufacturing an embossed sculptural wall sconce light creates a modern ambient wall fixture that diffuses soft illumination through textured plastic patterns. Cut the tapered top neck section off a large green plastic mineral bottle, preserving the smooth circular dome section for your lampshade base. Trace geometric diamond patterns onto the plastic dome using a permanent marker, carefully embossing along the traced line paths with a low-heat soldering iron tip to produce raised relief textures. Paint the interior surface with translucent white frost glass spray, while coating the textured exterior with a metallic copper finish to achieve an elevated metallic visual look. Mount the completed plastic shade over a cool-burning, battery-operated LED wall fixture using clear structural adhesive strips. This creative project elevates simple discarded plastic into a chic lighting accessory that casts warm geometric shadow patterns across hallway walls.
Idea 6: Fluted Ribbon Dispenser Tower
Step-by-Step Guide
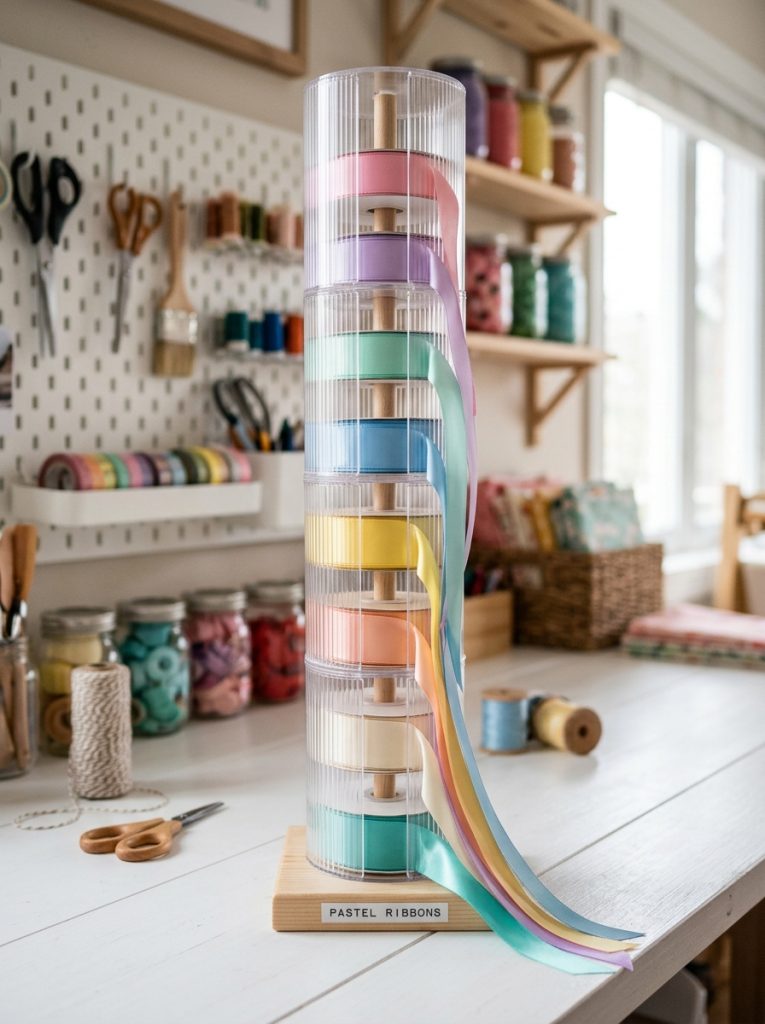
Designing a fluted ribbon dispenser tower resolves craft room clutter by storing spools of ribbon, thread, and decorative tape within a clear vertical column. Cut two clean plastic water bottles horizontally near their top shoulders, removing the neck spouts to leave smooth cylindrical plastic tubes. Cut a vertical half-inch slot down the full length of each plastic cylinder, lining the cut edges with clear vinyl edge trim to prevent ribbon fraying during pulling. Stack the two plastic cylinders end-to-end over a solid wooden base rod, securing the joining middle seam with heavy-duty clear decorative tape. Place multiple ribbon spools onto the central internal rod, threading the loose ribbon tails outward through the long vertical side slot. Spin the central spool stack freely to draw out desired lengths of craft ribbon without disturbing adjacent rolls. This smart organization system optimizes craft storage space cleanly.
Idea 7: Ribbed Vertical Cord Management Sleeve
Setup Method
Crafting a ribbed vertical cord management sleeve organizes tangled electrical wires and charging cables behind entertainment centers or home office desks. Cut the top spout and bottom base off four identical plastic bottles to yield four flexible, ribbed plastic cylinders of equal diameter. Cut a single straight vertical seam down one side of each cylinder, allowing the plastic walls to spring open flexibly around wire bundles. Join the four plastic cylinders end-to-end by sliding the outer lip of one tube half an inch into the opening of the next, securing the overlap with clear epoxy. Wrap the continuous hinged plastic sleeve over loose electrical cords, letting the curved plastic walls snap back around the wire bundle to conceal unsightly cables. Paint the exterior of the sleeve to match your room trim colors for a seamless look. This easy project keeps cords protected and out of sight.
Idea 8: Raised Geometric Seedling Nursery Tray
Execution Process
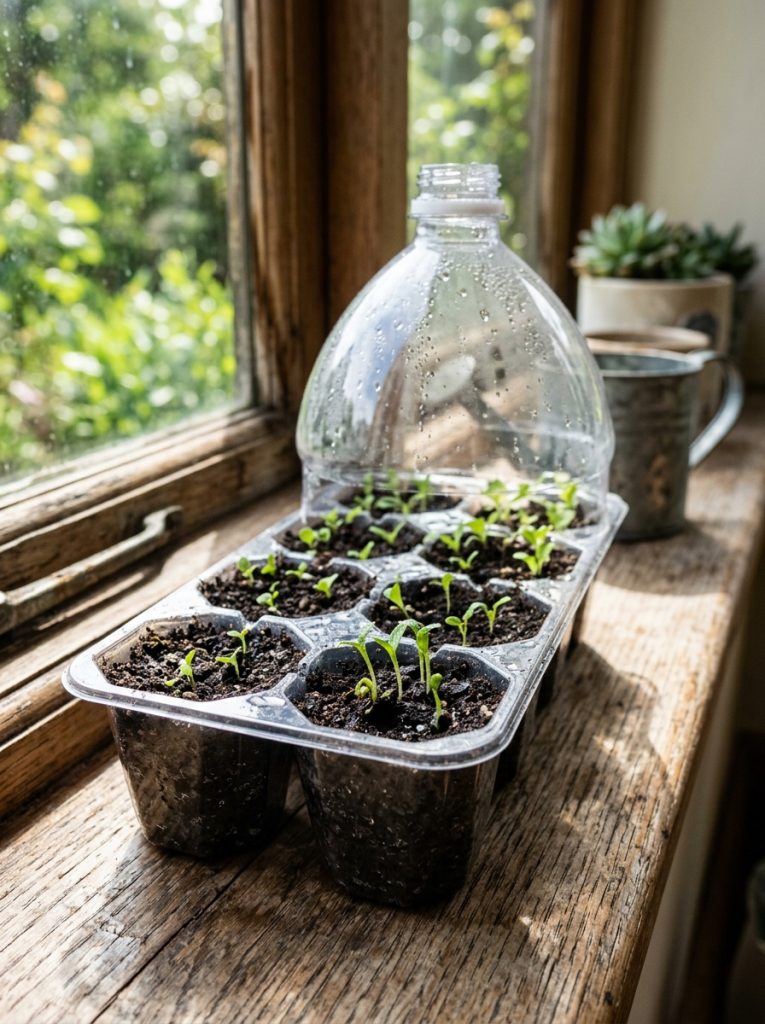
Constructing a raised geometric seedling nursery tray creates a mini greenhouse environment ideal for germinating seeds during early spring planting seasons. Cut a wide plastic soda bottle in half horizontally, reserving both the deep lower vessel and the upper domed neck section to serve as a matching base and lid. Punch small drainage holes in the bottom of the base vessel using a hot nail, then fill the container with two inches of seed-starting soil mix. Squeeze the soil lightly, plant small vegetable seeds at their required depth, and mist the surface thoroughly with fresh water. Fit the top neck dome upside down over the base vessel, keeping the cap loosely attached to regulate internal humidity and air circulation. Place the transparent seedling tray in a warm location until sprouts emerge cleanly. This functional tutorial delivers an eco-friendly nursery solution using basic materials.
Idea 9: Tiered Jewelry Dish and Accessory Tree
How to Make
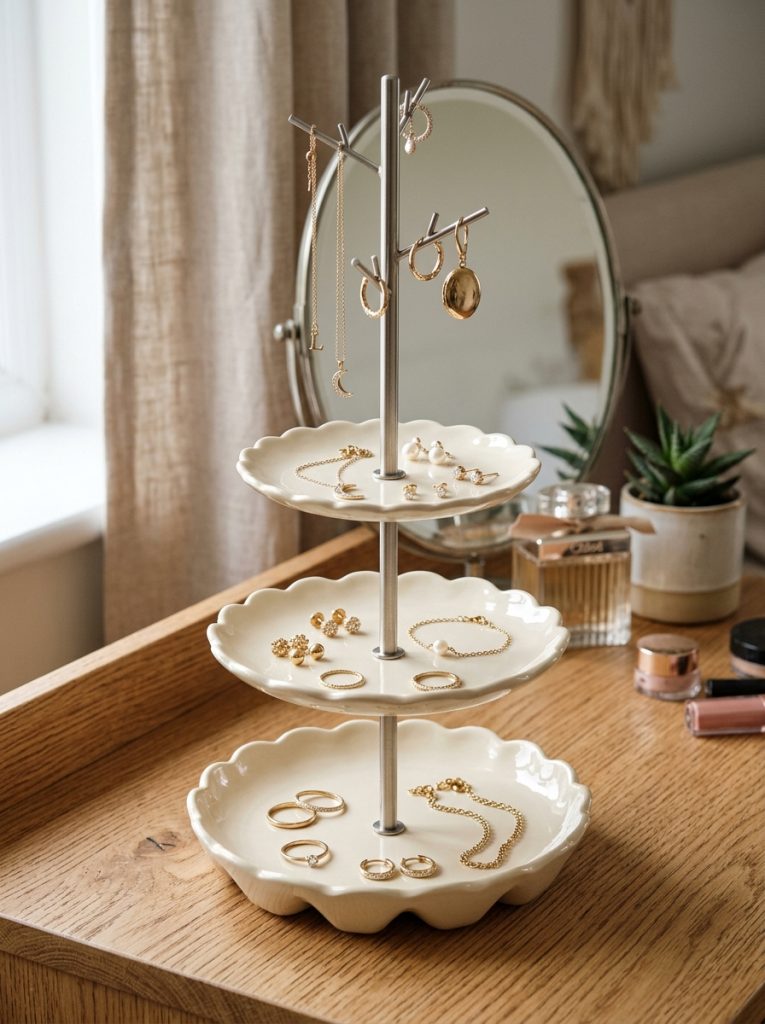
Assembling a tiered jewelry dish and accessory tree transforms decorative plastic bottle bases into a multi-level tray system for holding rings, earrings, and keys. Cut the detailed scalloped bottoms off three plastic bottles of varying sizes, using fine sandpaper to smooth all outer plastic edges completely. Heat the cut edges briefly near a candle flame to curve the rim borders inward slightly, generating an organic flower-petal silhouette. Drill a center quarter-inch hole through each plastic dish, threading a threaded steel rod fitted with metal nuts and washers through the three layers to create vertical spacing. Spray paint the entire assembled tier structure with a glossy cream ceramic coating, allowing it to cure for twelve hours. Place the finished accessory tree on a vanity or dresser to keep delicate jewelry organized. This aesthetic project provides high functional utility while displaying an elegant modern style.
Idea 10: Slotted Cable Storage Matrix Box
Step-by-Step Guide
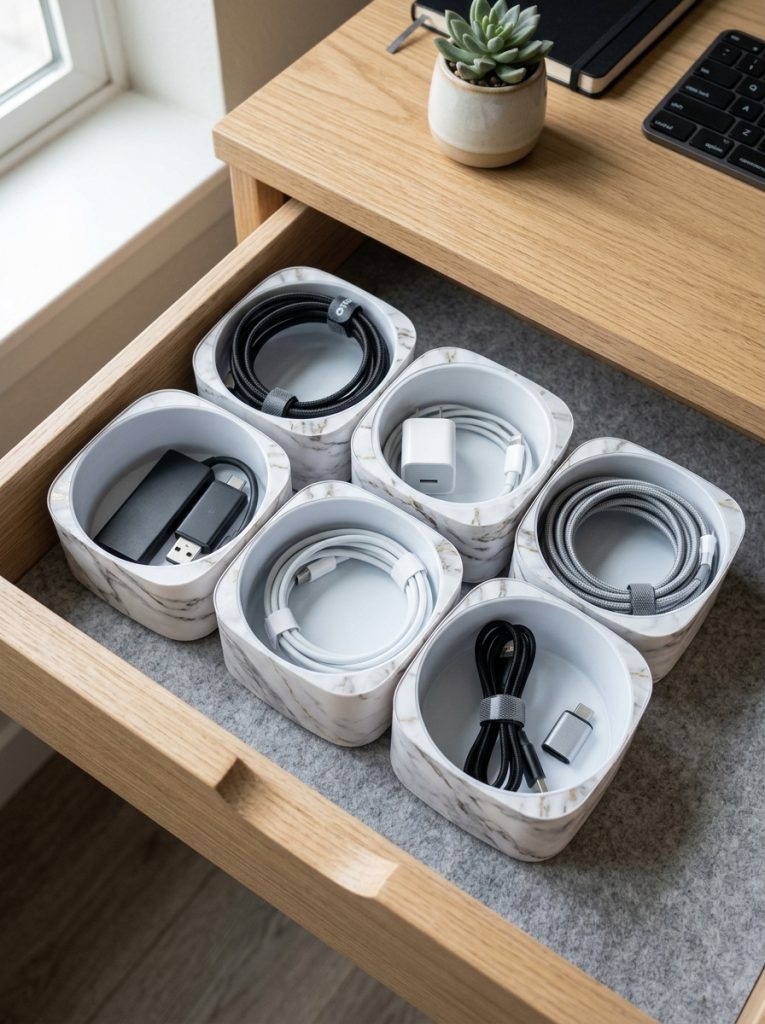
Fabricating a slotted cable storage matrix box provides structured internal drawer compartments that isolate small electronics, adapters, and audio cables cleanly. Cut six square-profile plastic water bottle bases to a uniform height of three inches, discarding the top bottle portions. Wrap the exterior walls of each clear plastic square container with decorative contact paper or textured fabric tape to create an opaque, stylish outer finish. Glue the six individual plastic compartments side-by-side into a two-by-three rectangular grid configuration using quick-setting hot glue sticks. Place the rigid matrix assembly inside a shallow desk drawer or shelf storage box to establish individual storage cells for coiled cords. Slide individual folded cables vertically into each dedicated cell compartment to prevent tangling during drawer movement. This practical organization solution optimizes space efficiency across home office setups effortlessly.

Common Beginner Mistakes and How to Avoid Them
Working with upcycled plastic bottles can present specific material challenges related to sharp cut edges, uneven paint coverage, and adhesive structural failure. A frequent mistake among beginners is using dull scissors or utility blades, which crush the thin plastic walls and produce jagged, uneven cut lines. Always use fresh, sharp blades and trace clear pencil guidelines around bottle circumferences before cutting to ensure clean straight edges. Another common error involves applying heavy coats of water-based paint directly onto slick, unprimed plastic surfaces, leading to peeling and flaking over time. Prevent paint failure by lightly sanding the plastic exterior with fine sandpaper and applying an acrylic primer base prior to adding color. Additionally, using high-temperature hot glue can melt thin bottle walls, so always choose low-temperature glue tools or specialized plastic-bonding adhesives for structural joints.
Practical Tips for Better Results
Achieving professional-quality finishes when upcycling plastic bottles requires careful attention to material cleaning, smooth edge trimming, and proper curing procedures. Always remove residual glue left behind by commercial bottle labels by soaking containers in warm soapy water mixed with a small amount of household oil. Smooth newly cut plastic rims by pressing them briefly against a medium-warm clothing iron lined with parchment paper, which melts sharp edges into rounded, smooth borders. When painting plastic components, apply multiple thin coats of spray paint or acrylic craft paint rather than one thick application to achieve an even, drip-free surface texture. Secure complex multi-part structural assemblies with temporary painter tape while adhesives cure fully over several hours. Following these practical guidelines ensures your finished projects demonstrate high structural integrity, polished aesthetic surfaces, and lasting functional utility throughout your home space.
Styling, Presentation, or Organization Ideas
Integrating upcycled plastic bottle crafts into your home interior relies on combining clean geometric shapes, refined color palettes, and intentional space planning. For a modern minimalist style aesthetic, paint finished storage containers in neutral matte tones like warm linen, slate gray, or muted terracotta to match existing home furnishings. Group desktop organizers and planter columns in odd-numbered clusters on open floating shelving to form balanced visual displays within living rooms or home offices. When presenting hanging items like bird feeders or wall sconces, choose natural hanging materials like jute cord or metallic wire to elevate the visual appeal. Label storage compartments using minimalist printed tags or hand-lettered labels to enhance functional organization across studio spaces, children playrooms, and entryway tables. Consistent styling ensures upcycled plastic creations appear intentional, stylish, and fully integrated into contemporary living spaces.
Budget or Time Planning
Managing project costs and assembly schedules guarantees a smooth, enjoyable DIY experience when creating plastic bottle accessories. Because the primary structural material consists of post-consumer plastic containers, raw material expenses remain exceptionally low, allowing crafters to invest funds into quality adhesives, primers, and specialized cutting tools. Allocate roughly twenty percent of your craft budget toward cutting tools like precision shears, thirty percent toward paints and clear sealers, and fifty percent toward structural adhesives and hardware. In terms of time allocation, budget twenty minutes for cleaning and prepping plastic bottles, forty minutes for precise cutting and assembly, and thirty minutes for applying decorative surface finishes. Allowing two hours for complete adhesive curing and paint drying ensures long-lasting structural stability, preventing failure during regular daily use.
Creative Expansion and Advanced Inspiration
Once fundamental plastic bottle manipulation techniques are mastered, crafters can expand these projects into complex architectural structures and integrated home accessories. Experiment with combining upcycled plastic shapes with complementary natural materials like solid wood blocks, brass hardware, or woven rattan to create rich visual contrast. Integrate battery-powered LED lighting strings inside cut plastic wall installations to transform flat relief art into ambient lighting displays that cast complex geometric shadows. Advanced makers can also explore large-scale modular construction, using dozens of uniform plastic bottles to build outdoor garden greenhouses, vertical hydroponic walls, or lightweight floating storage units. Sharing documented step by step photos of your finished projects on platforms like Pinterest inspires wider community engagement while demonstrating how everyday discarded items can be transformed into functional, aesthetic art through creative design thinking.