
Empty pill bottles are frequently discarded as single-use plastic, yet their small cylindrical shape makes them ideal vessels for indoor gardening. Transforming medical containers into mini succulent planters is a sustainable craft that maximizes small space gardening along sunny windowsills. Readers exploring this tutorial will discover clear techniques to convert prescription and supplement bottles into functional, stylish micro planters using acrylic paints, natural fibers, draining soils, and decorative finishes. Upcycling plastic containers allows homeowners and apartment dwellers to create compact botanical displays without spending significant money on retail ceramic pots. This easy project introduces fundamental indoor gardening principles while providing creative ideas to enhance home decor with vibrant greenery. By learning how to prepare plastic surfaces and establish proper drainage, crafters can safely cultivate slow-growing succulents while actively reducing plastic household waste.
Why This Idea Is Trending or Useful
Repurposing everyday household plastic items represents one of the most practical trending ideas across modern interior organization and gardening circles. Pill bottle planters offer high practical value because their compact dimensions fit perfectly on narrow windowsills, floating shelves, and small office desks where traditional pots are too wide. Their lightweight durable construction provides strong DIY appeal, offering an accessible entry point into crafting that is entirely beginner friendly. Design relevance is another key factor, as these small vessels can be customized with modern minimalist style finishes, textured rope, or painted patterns that suit any aesthetic home decor. The flexibility of using upcycled plastic allows individuals to experiment with indoor propagation and plant arrangement without financial commitment, making upcycled micro planters a functional, eco-conscious choice for contemporary indoor decoration.
Materials and Preparation
Proper preparation ensures long-term plant health and visual appeal when building customized windowsill planters from upcycled containers. Begin by collecting empty plastic pill bottles, soaking them in warm soapy water to peel away paper labels and adhesive residue entirely. Essential materials include coarse grit sandpaper, a handheld drill or heated metal tool for drainage holes, outdoor acrylic paints, natural jute cord, craft adhesives, potting soil formulated for cacti, and small succulent cuttings. Planning considerations require evaluating your windowsill light exposure, as succulents thrive best in bright, indirect sunlight for several hours daily. Sanding the smooth plastic exterior is a critical preparation step that allows paints and adhesives to grip the surface without flaking over time. Ensure all containers are thoroughly rinsed and completely dry before drilling drainage holes and adding soil layers.
Terracotta Painted Micro Pots
How to Create
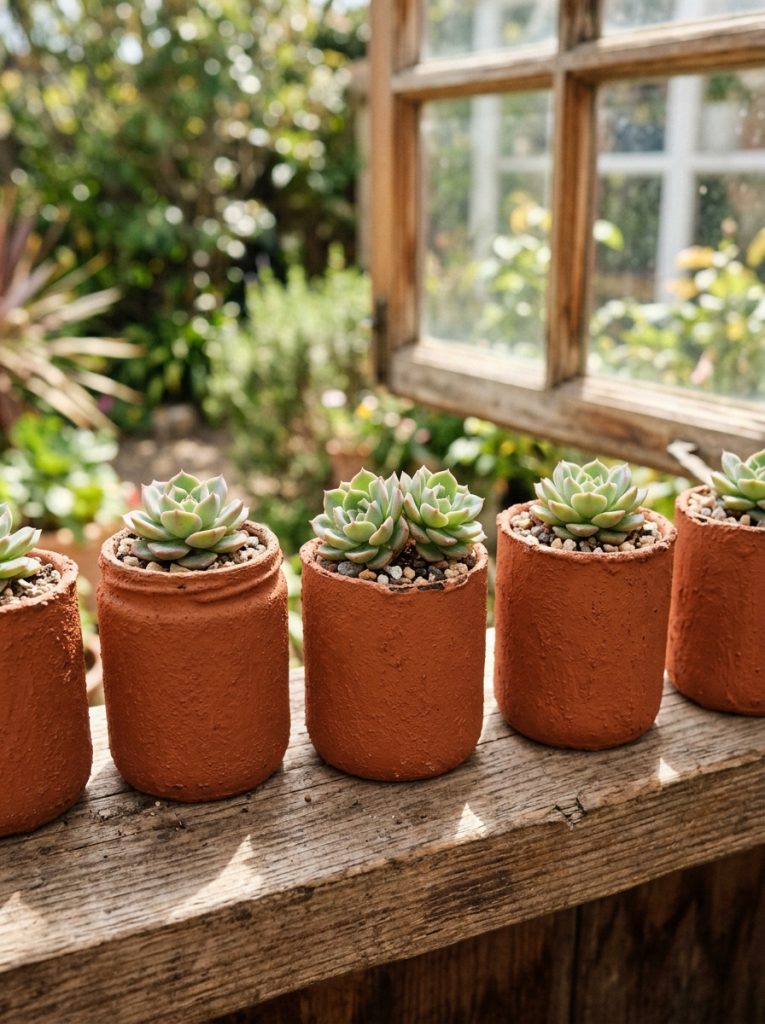
Achieving the warm look of traditional clay pottery on lightweight plastic involves simple layering techniques and textured paint application. Clean a medium pill bottle thoroughly, then lightly scuff the exterior surface with fine-grit sandpaper to promote paint adhesion. Mix terracotta-colored acrylic paint with a small pinch of baking soda to create a subtle gritty paste that mimics natural porous clay. Apply two thick coats of this textured mixture across the outer plastic surface, letting each layer dry completely before adding the next. Drill three small drainage holes in the bottom cap using a low-speed power drill. Add a layer of coarse pea gravel at the base, fill the cylinder with well-draining cactus soil mix, and plant a small rosette succulent inside. The matte earthy finish disguises the plastic base completely, creating an authentic rustic aesthetic that sits neatly on sunny windowsills alongside larger traditional clay planters.
Jute Rope Wrapped Mini Planters
Step-by-Step Guide
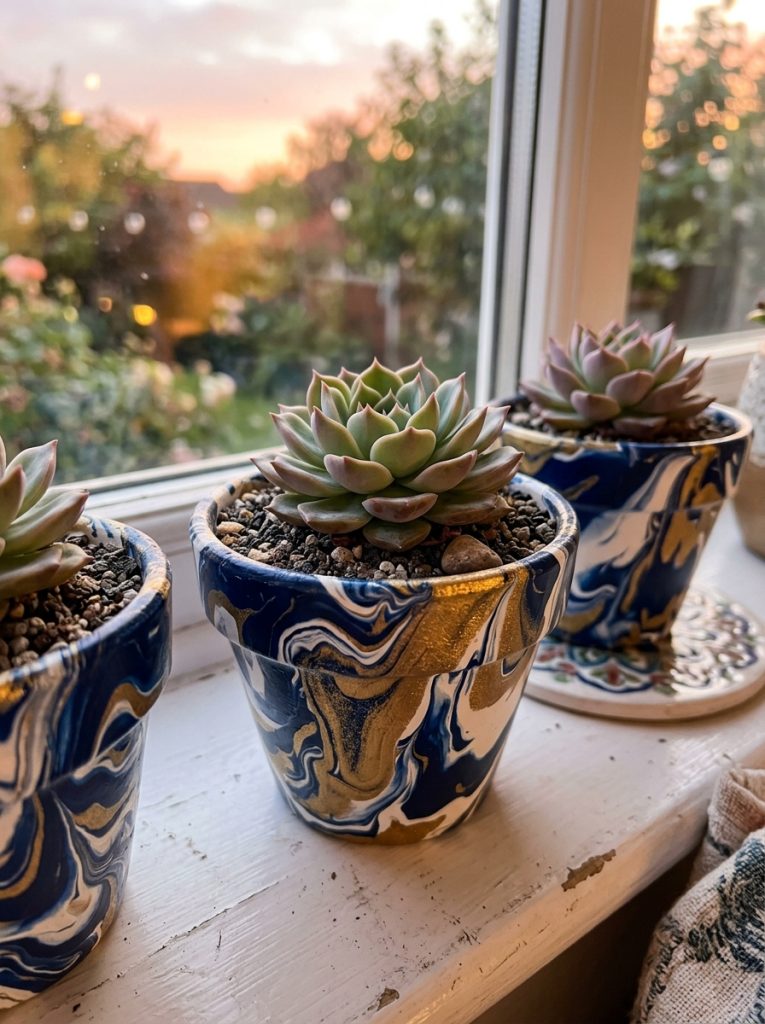
Wrapping utility plastic containers in natural fiber cordage creates an organic textured look that fits modern bohemian and farmhouse decor styles. Prepare a clean amber or transparent pill container by wiping the outer walls with rubbing alcohol to remove residual skin oils. Apply a line of strong waterproof craft adhesive near the bottom rim and begin coiling natural jute twine tightly around the base. Continue spiraling the rope upward in dense, even rows, applying small dots of glue along the path until the top lip is completely covered. Carefully pierce two drainage holes through the plastic base using a heated metal craft tool. Fill the interior with a specialized fast-draining succulent soil mix and gently insert a compact succulent cutting, such as a mini sedum or jade branch. The contrast between soft textured twine and dark green succulent leaves brings a cozy handmade touch to any window space.
Matte Black Minimalist Cylinders
How to Make
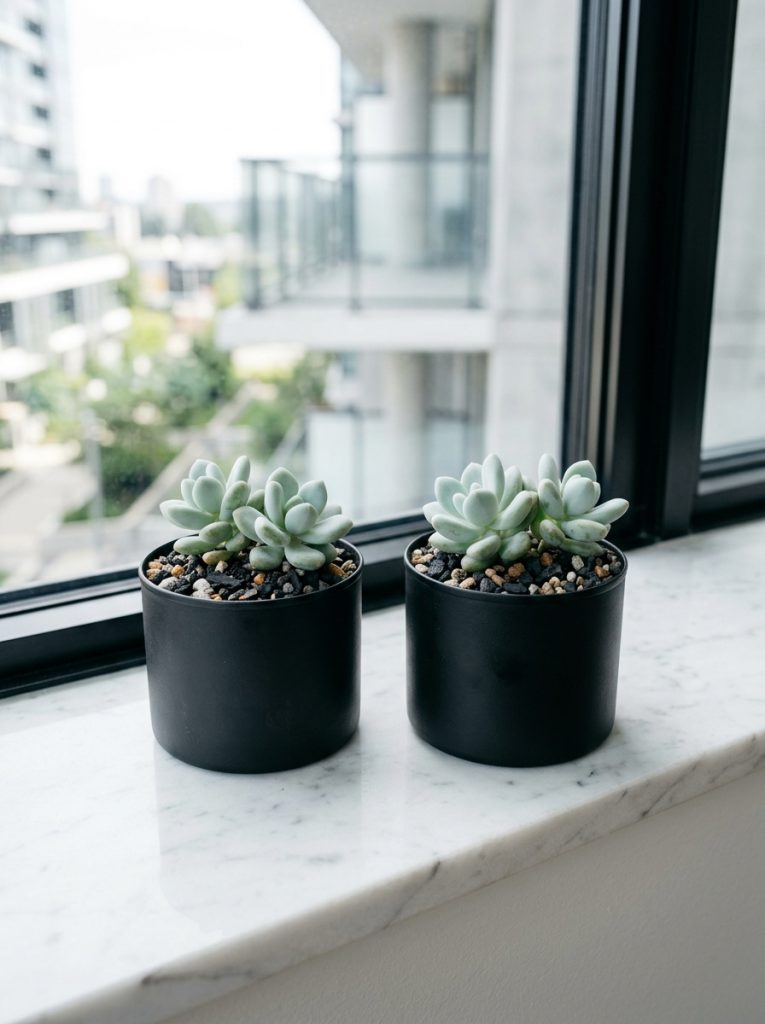
Clean lines and solid dark tones give upcycled plastic containers an ultra-modern aesthetic suited for contemporary desks and window displays. Select tall, uniform pill bottles and sand the entire outer surface to remove glossy factory sheens. Coat the containers with two light applications of matte black acrylic spray paint, maintaining a consistent distance to prevent paint drips or uneven buildup. Once the paint cures to a smooth finish, drill a single quarter-inch drainage hole through the center of the bottom cap. Line the bottom of the container with a tiny piece of mesh screen to prevent soil loss, then pack fast-draining gritty potting soil into the cylinder. Seat a small pale-green succulent, like an echeveria or moonstones plant, into the top layer. The dark matte surface creates a bold contrast against light windowsill frames, offering an elegant minimalist style arrangement that looks refined and intentional.
Birch Bark Effect Tabletop Pots
Setup Method
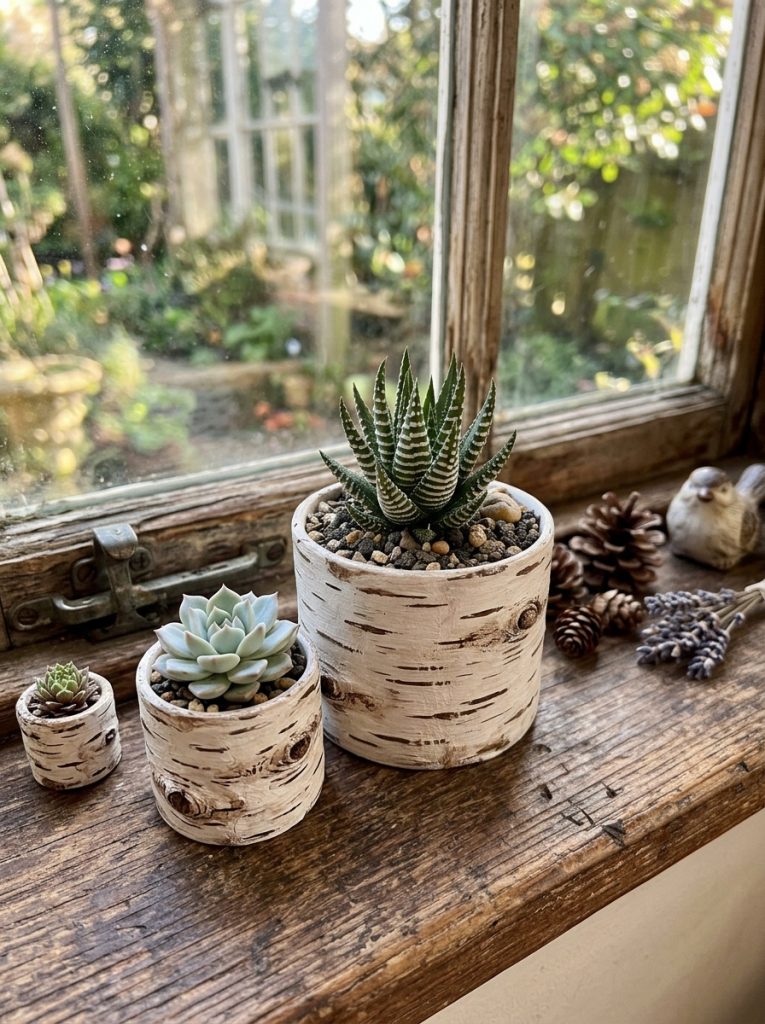
Simulating natural wood textures allows simple plastic cylinders to blend seamlessly into rustic interior design themes. Begin by scuffing a clean, dry pill bottle with medium-grit sandpaper to prepare the exterior walls for painting. Apply an opaque base layer of off-white or creamy ivory craft paint across the entire container surface and allow it to dry fully. Using a fine-tipped detail brush and dark brown or charcoal paint, paint thin horizontal streaks and small knots across the white base to replicate natural birch bark patterns. Drill proper drainage openings in the bottom surface before adding a thin drainage layer of small lava rocks. Fill the vessel with succulent potting mix and secure a small haworthia or aloe cutting into the center. This realistic faux-wood technique hides the plastic container while creating an charming nature-inspired accent suitable for bright kitchen windowsills.
Speckled Granite Stone Planters
Execution Process
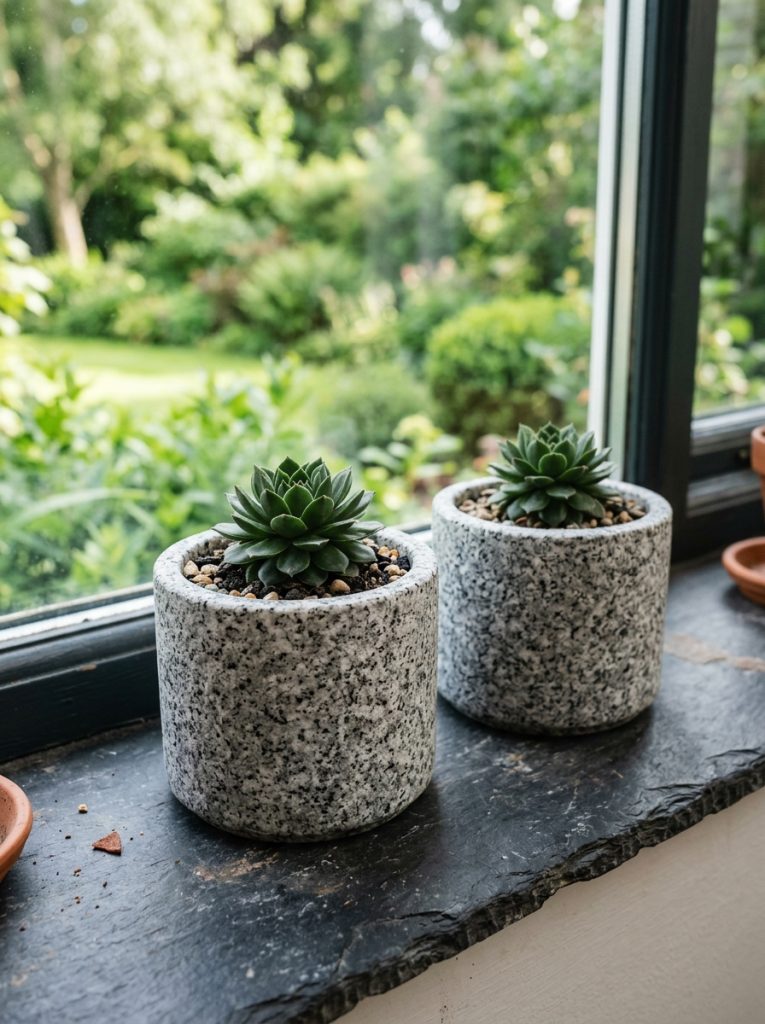
Replicating heavy stone finishes on lightweight plastic containers brings a premium architectural look to tiny indoor window gardens. Thoroughly wash a wide-mouth pill container and scuff the outer plastic surface using coarse sandpaper. Apply a solid base coat of mid-tone grey acrylic paint over the entire cylinder wall and let it dry completely. Dip a stiff-bristled toothbrush into dark grey paint, then flick the bristles with your thumb to spray tiny speckles across the surface; repeat this technique using white paint to build depth. After the speckled paint dries, apply a protective matte varnish layer to seal the decorative surface against water damage. Drill several small drainage holes through the plastic base, add lightweight potting substrate, and seat a compact stonecrop succulent inside. The finished container closely resembles solid carved granite, creating a sturdy visual appearance while remaining lightweight and practical for fragile shelf displays.
Pastel Chalk Paint Nursery Pots
How to Create
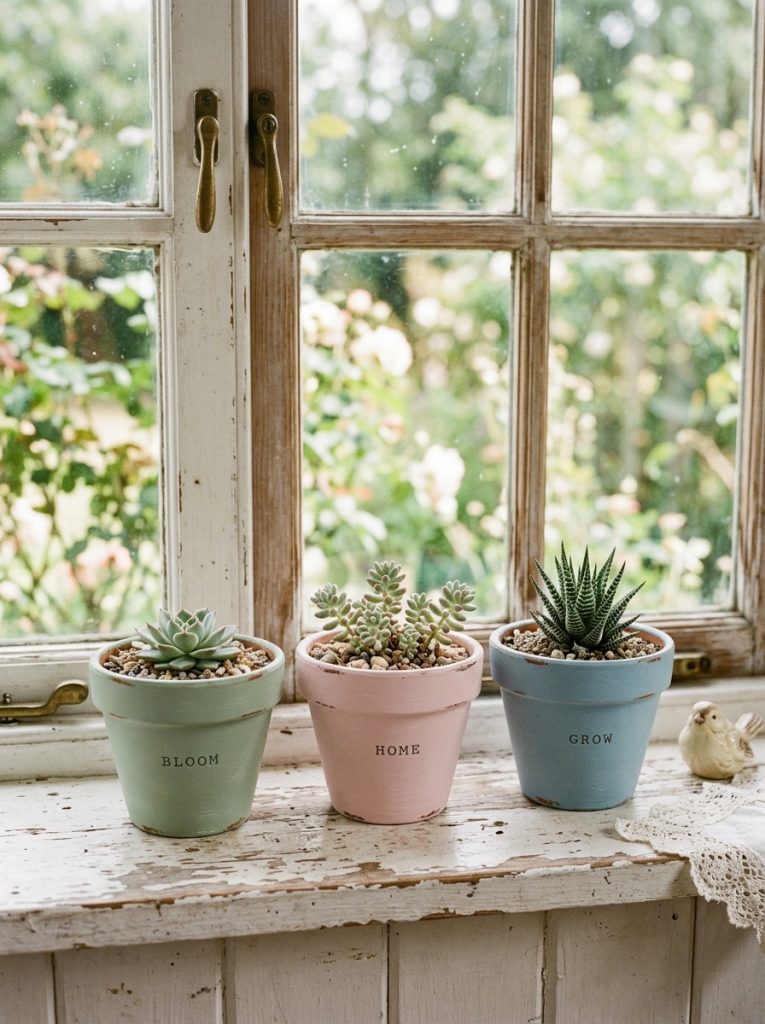
Soft pastel finishes provide a subtle pop of color that brightens kitchen windowsills and nursery spaces with gentle vintage tones. Select clean pill bottles of various heights and sand the smooth plastic exteriors lightly to ensure paint adhesion. Apply two even coats of chalk finish paint in muted pastel shades such as sage green, dusty rose, or soft robin-egg blue. Once dry, lightly rub fine sandpaper along the top rim and bottom edge to expose tiny bits of plastic underneath for a gently aged look. Drill several drainage holes into the base cap before placing a small coffee filter inside to hold the soil securely. Fill the container with a porous cactus soil mix and carefully introduce a slow-growing succulent cutting. Grouping multiple pastel planters in various heights creates an organized, colorful windowsill arrangement that highlights the soft textures and unique shapes of individual succulent species.
Metallic Copper Accent Vessels
Step-by-Step Guide
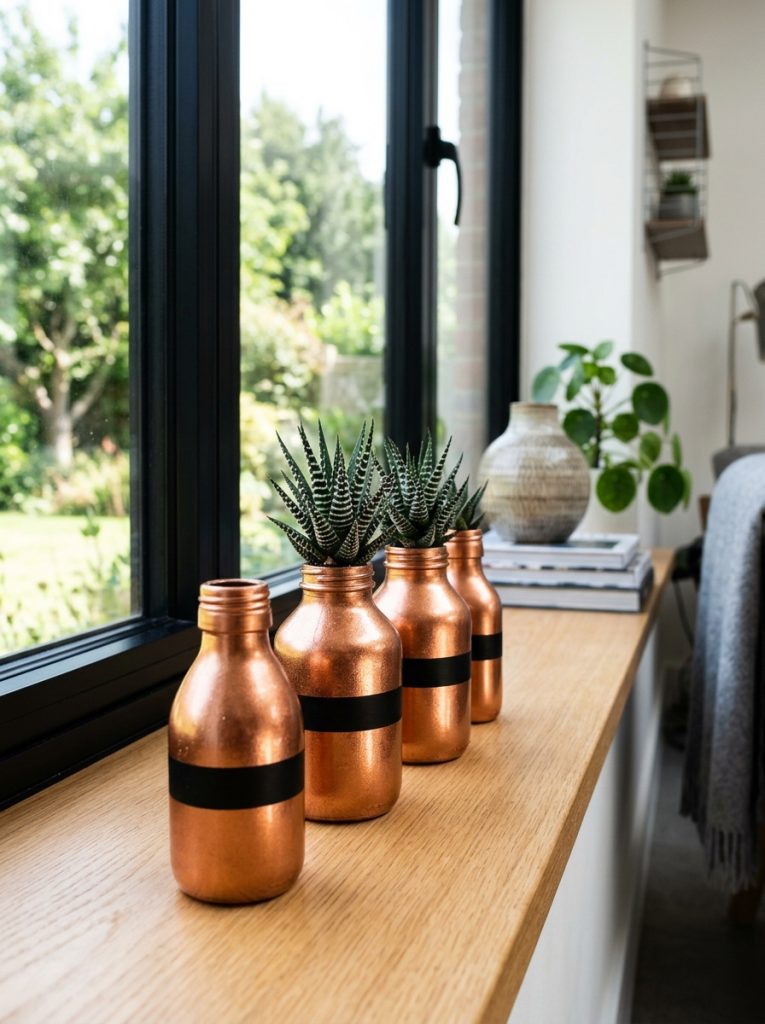
Warm metallic copper highlights add a sleek modern touch to small upcycled planters, reflecting sunlight beautifully along bright window frames. Wash and thoroughly dry a smooth plastic pill bottle, removing all sticky label residues with alcohol. Apply a high-shine copper metallic acrylic paint or spray finish across the entire container, applying two thin coats for full coverage. Allow the paint to cure completely before wrapping a narrow band of dark black electrical tape or painted paper around the middle section to create a striking two-tone metallic design. Drill appropriate drainage holes through the bottom of the bottle to prevent water stagnation around sensitive roots. Fill the vessel with coarse succulent soil and plant a dark green zebra haworthia inside. The reflective copper surface catches natural outdoor light, making small windowsills feel brighter while displaying your handmade upcycled creation in style.
Faux Cement Geometric Containers
Execution Process
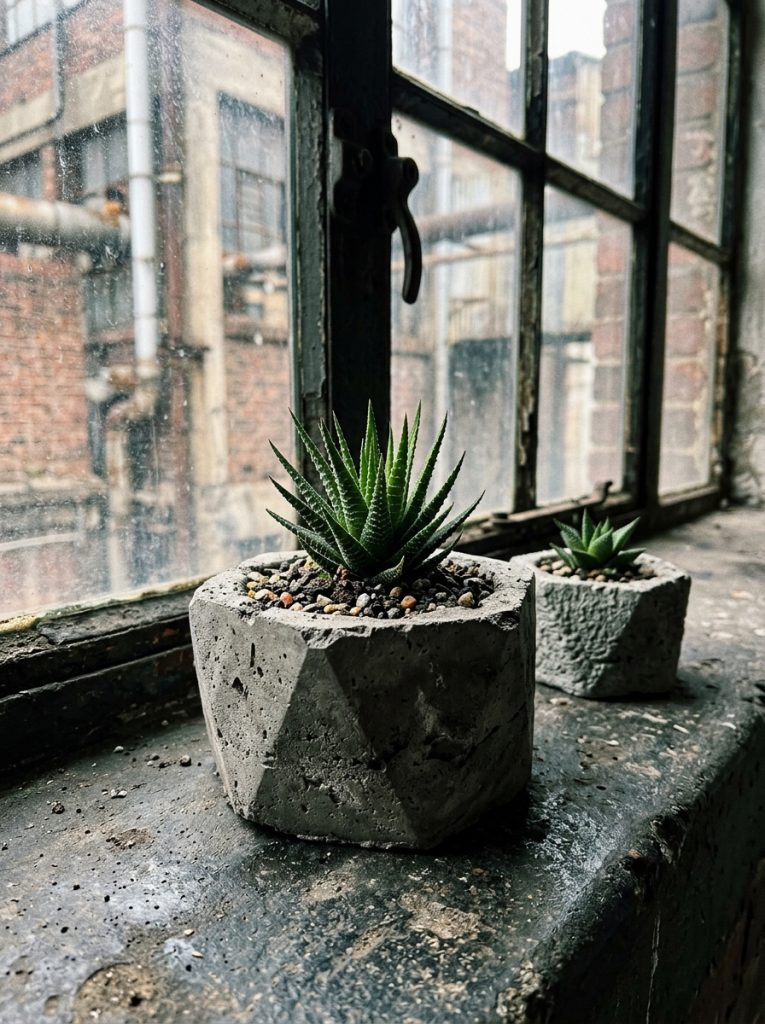
Industrial cement textures can be easily recreated on plastic pill bottles using simple plaster mixtures and grey paint layers. Sand the outer walls of a sturdy plastic bottle thoroughly, creating a rough surface that enables heavy craft pastes to stick. Mix grey acrylic paint with lightweight spackling compound or plaster powder to form a thick, moldable paste. Apply the grey paste over the plastic bottle using a flat craft spatula, creating subtle flat facets and sharp vertical angles to mimic cast concrete. Allow the plaster mixture to harden completely over several hours, then apply a matte clear sealant to protect against water exposure during plant watering. Drill critical drainage holes in the plastic base before filling the interior with gritty potting soil and a small succulent. The resulting planter has the rugged industrial look of solid cast concrete without the heavy weight or difficulty of traditional cement casting.
Pressed Moss and Twine Wrap Pots
Setup Method
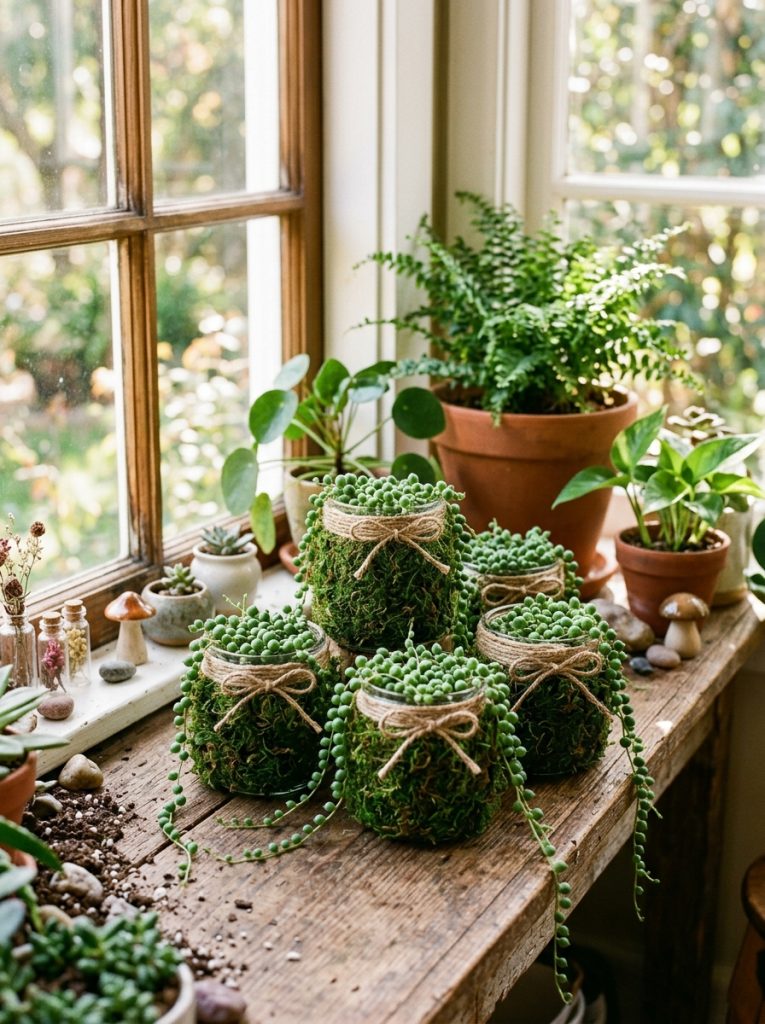
Combining natural preserved moss with simple twine wrapping creates a lush botanical container that complements live succulent foliage. Prepare a clean, empty pill bottle by roughing up the plastic exterior with coarse sandpaper. Spread a thin layer of waterproof craft glue over the bottom half of the bottle and press small patches of preserved green sheet moss firmly onto the surface. Wrap thin jute cord tightly around the top rim of the bottle, securing the cord ends with a tiny bead of adhesive. Drill multiple drainage holes in the plastic bottom, placing a small layer of gravel over the holes inside the container. Pack porous succulent soil tightly into the top section and plant a small succulent, such as a string of pearls or sedum cutting. The rich green moss texture blends seamlessly with the living plant, making the upcycled plastic container virtually invisible within garden displays.
High-Contrast Marbled Dip Planters
How to Make
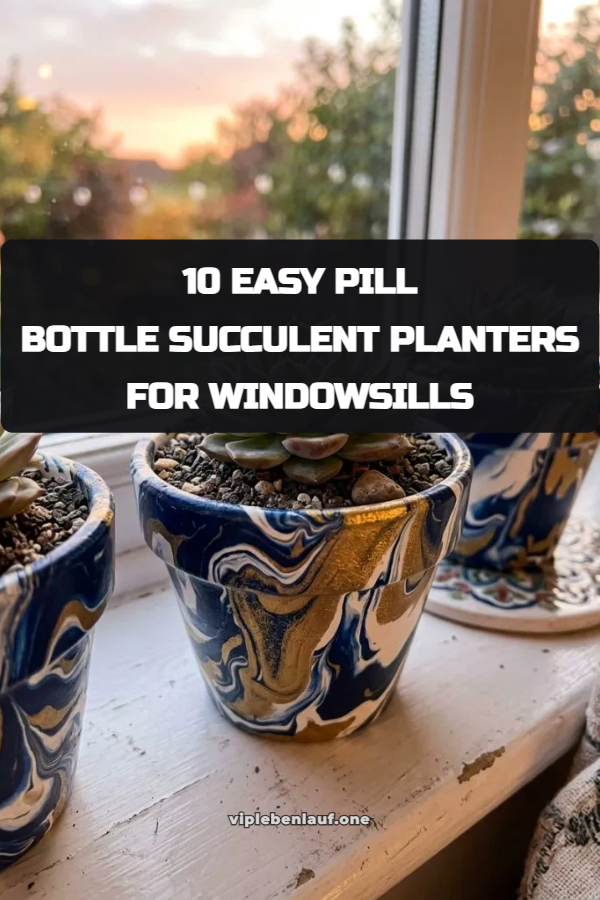
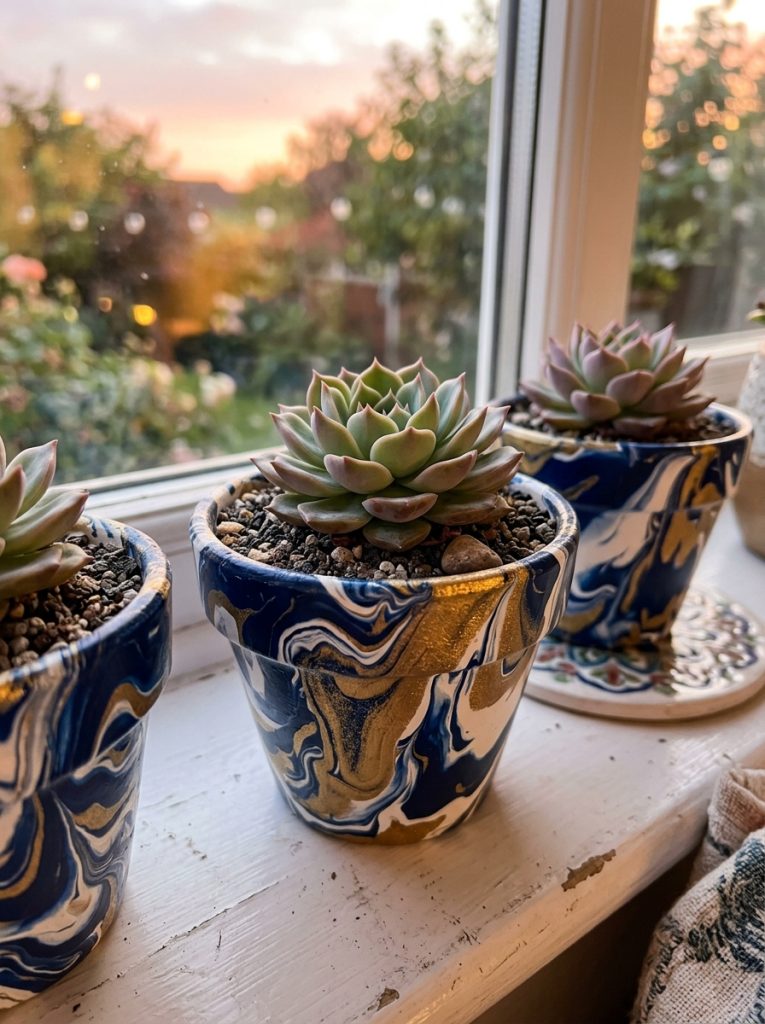
Swirling multiple acrylic paint colors produces custom marbled patterns that make every handmade plastic planter entirely unique. Fill a small disposable container with warm water and float several drops of dark blue, white, and metallic gold enamel paints on the surface. Gently swirl the floating paints using a toothpick to form fluid marble patterns across the water line. Dip a pre-sanded, clean pill bottle slowly into the water mixture, allowing the floating marble film to adhere smoothly to the outer plastic walls. Pull the container out carefully and set it upside down on wax paper until dry. Drill drainage holes through the plastic base, add cactus potting soil, and insert a small rosette-shaped succulent. The intricate swirled design creates a high-end decorative planter that transforms discarded prescription bottles into eye-catching artistic accents for bright indoor spaces.
Common Beginner Mistakes and How to Avoid Them
Cultivating healthy succulents in tiny upcycled pill bottles requires avoiding a few common structural and care errors. The most frequent mistake is omitting drainage holes in the bottom of the plastic container. Succulents suffer from root rot rapidly if excess water remains trapped in non-porous plastic cylinders; drilling small holes is essential for plant survival. Another common error is using standard dense potting soil, which retains far too much moisture for small containers. Always choose a gritty cactus mix containing perlite, pumice, or coarse sand to ensure rapid water drainage. Additionally, overwatering is a major risk in micro planters, as the small volume of soil stays damp longer if air circulation is limited. Water your upcycled planters sparingly, allowing the soil to dry out completely between waterings to keep roots firm and healthy.
Practical Tips for Better Results
Achieving professional aesthetic finishes and healthy plant growth relies on attention to detail during the build process. Always sand glossy plastic pill containers thoroughly before applying paints or adhesives, as un-sanded plastic causes decorative finishes to peel away quickly when exposed to sunlight. To prevent soil from washing out through bottom drainage holes, place a small piece of mesh screen or a tiny cut of coffee filter over the interior base before adding soil. When selecting succulents for pill bottle planters, choose slow-growing varieties or tiny offset cuttings like haworthias, sedums, and small gasterias that suit restricted root zones. Placing your finished micro planters on a narrow tray protects wooden windowsills from accidental water spills during maintenance. Finally, rotate your planters weekly so all sides receive balanced sunlight, encouraging uniform compact growth across your windowsill garden.
Styling, Presentation, or Organization Ideas
Arranging micro pill bottle planters thoughtfully enhances their decorative impact along bright indoor windowsills and shelves. Grouping planters in clusters of three, five, or seven creates a visually appealing composition that looks intentional and organized. Varying the physical height of containers by using elevated wooden blocks, small stone coasters, or books adds dynamic depth to your windowsill arrangement. You can also organize planters by color scheme, pairing sleek black and metallic copper vessels for modern rooms, or grouping pastel and rope-wrapped pots for rustic interiors. Mounting small magnetic strips inside metal window frames allows you to attach tiny magnets to the back of lightweight pill bottle planters, creating a floating vertical garden display. Combining different succulent shapes, such as trailing strings of pearls alongside upright haworthias, provides rich visual variety within compact plant collections.
Budget or Time Planning
Crafting upcycled pill bottle planters is an exceptionally economical project that requires minimal financial outlay and time commitment. Most core materials, including plastic bottles, sandpaper, and basic craft tools, are readily available around the home at no additional cost. Specialty supplies like cactus soil mixes, small succulent cuttings, and acrylic paints can be acquired for minimal expense, keeping total project costs negligible per planter. In terms of time allocation, preparing and decorating a single container takes approximately fifteen to thirty minutes, excluding paint drying periods. Working in small batches allows you to clean, sand, and paint several bottles simultaneously, maximizing efficiency across a afternoon project. This low cost and quick execution make micro planter crafting an ideal weekend activity for beginners seeking affordable ways to enhance their home decor with fresh greenery.
Creative Expansion and Advanced Inspiration
Once you master basic pill bottle planter techniques, numerous advanced concepts allow you to scale up your upcycled gardening projects. You can join multiple painted pill bottles horizontally using strong waterproof adhesives or metallic wire to create a continuous multi-cell succulent trough for wider windowsills. Integrating small LED strip lights beneath floating windowsill shelves highlights the unique textures and colors of your custom pots during evening hours. Another creative extension involves attaching sturdy suction cups to the backs of decorated bottles, enabling you to mount micro planters directly onto window glass at varying heights. You can also experiment with embedding small neodymium magnets inside the back wall of containers to create functional succulent magnets for metal refrigerator doors and magnetic office boards, expanding your upcycled indoor garden beyond conventional windowsill spaces.